
How to Choose The Best Laser Engravers for Home Use
There is a wide range of laser engravers that are generally considered best for home use, ranging from beginner-friendly diode laser engravers to budget CO2 laser engravers. What makes these laser engravers suitable for home use is that they're Class 1 enclosed units with the ventilation needed to block harmful fumes and prevent eye damage.
- In general, enclosed diode or galvo laser engravers are highly recommended for home use because they offer safety, modular flexibility, and built-in cameras.
- 40W CO2 laser engravers are also highly recommended for home laser engraving: the models most recommended for home use tend to be affordable, compact, entry-level choices suited to small spaces and low-budget learning.
However, if you want to narrow down your choices and pick the best laser engraver for your home, there are three important questions to answer first:
- What is your budget?
- What materials do you intend to engrave most (if not all) of the time?
- Do you have enough space and access to proper ventilation?
Answering these three questions will help you narrow down your options and land on the exact model you need.

Laser Engravers for Home: Hobby vs. Small Business Models
Choosing between a hobbyist machine and a small-business-grade laser comes down to budget, but budget maps fairly predictably to material compatibility, cutting speed, and ventilation needs, so it's worth understanding what each tier actually gets you.
1. The Entry-Level Hobbyist Tier (Budget: £200 – £1,000)
If you're a beginner just dipping your toes into laser engraving, an open-frame or mini-enclosed diode or compact CO2 laser is the standard starting point.
- xTool M2 Series: Frequently praised by users for having a very gentle learning curve. The enclosed Class 1 safety design, built-in air pump, and beginner-friendly software make it a strong pick for home crafters.
- AtomStack P1 5W: A highly compact, budget-friendly machine that requires zero assembly. Its enclosed design and optional dual-laser setup (diode + infrared) let you switch between organic materials and light metal engraving.
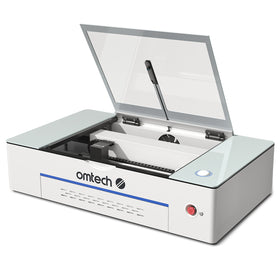
- OMTech K40+ 45W Desktop CO2 Laser Engraver: A step up in power for the same tier, this enclosed 45W CO2 unit comes with a 300x200mm working area and a detachable honeycomb workbed, making it a solid budget option if you want CO2-level cutting and engraving (wood, acrylic, leather) without moving into the mid-range price bracket. Optional bundles add a fume extractor, rotary attachment, or water chiller.

2. The Mid-Range and Turnkey Crafting Tier (Budget: £1,000 – £2,500)
This tier is ideal for serious hobbyists, Etsy sellers, and side-hustles that want high speed, physical safety, and minimal machine tuning right out of the box.
- OMTech Polar Lite 55W Desktop CO2 Laser Engraver: An all-in-one enclosed desktop CO2 laser that fits this budget squarely. It handles the classic CO2 strengths, wood, leather, acrylic (including clear), and glass, and can be configured with a standard rotary attachment or bundled LightBurn software for cylindrical projects like tumblers and drinkware.
- Roly Automation LaserMATIC MK2: Works well with wood, leather, opaque acrylics, and coated glass. Its rigid, built-in metal enclosure and industrial-grade structural rigidity make it a favorite for garage or workshop spaces with window venting, and its built-in air assist system adds further value at a competitive price.
3. The Pro-Hobbyist and Small Business Tier (Budget: $2,500+)
This tier is mandatory if your primary goal involves cutting clear acrylic, processing high volumes of wood, or engraving raw, bare metals at scale.
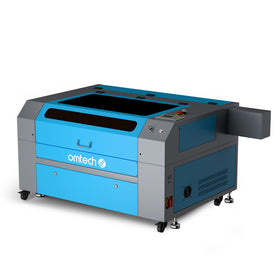
- OMTech Turbo CO2 Laser Engraver Series (60W–100W): These cabinet-style CO2 lasers, including the autofocus-equipped AF2028 models, are the gold standard for cutting all colors of acrylic (including clear and white), deep wood cutting, and direct glass frosting. They won't engrave bare metal without a marking spray. Package options add LightBurn, a water chiller, or a rotary attachment for cylindrical work.
- OMTech Pronto 40 (90W CO2): Built for higher-volume production and larger sheet goods, with autofocus and rotary/chiller add-ons available. This is the natural step up once a Maker-series machine's working area starts to feel small.
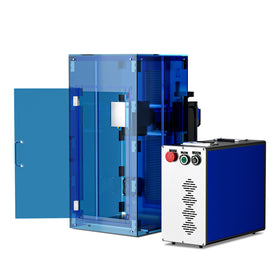
- OMTech Galvo and MOPA Fiber Lasers (30W–100W): If bare metal marking, jewelry, or deep engraving is the priority consider OMTech fiber laser engravers. These models range from 20W to 50W, and they all come with safety enclosings for use in smaller spaces and at home. The MOPA lasers are compact, and great for color laser engraving.

Key Warning About Laser Engravers At Home!
Regardless of which tier you land in, these machines all require external ventilation and, for the CO2 units, physical space for a water chiller (like a CW-5200) to keep the glass laser tube cool. In exchange, you get material freedom for organic items and signage work without proprietary software lockouts.
Laser Engravers For Home Use: Price Tiers and Models Summarized
| Tier | Budget | Best For | Key Machines | Main Capabilities | Main Limitations |
| Entry-Level Hobbyist | 200–1,100 | Beginners, casual home projects, small crafts | xTool M2 Series, AtomStack P1 5WOMTech K40+ 45W | Basic engraving; wood, leather, acrylic; compact and beginner-friendly | Smaller work areas, slower production, limited metal capabilities |
| Mid-Range / Turnkey | 1,000–2,500 | Serious hobbyists, Etsy sellers, side businesses | xTool S1 40W, Roly Automation LaserMATIC MK2, OMTech Polar Lite 55W | Faster cutting/engraving; wood, leather, acrylic, glass; tumblers with rotary | Diode models have limitations with clear acrylic and bare metals; higher cost |
| Pro-Hobbyist / Small Business | $2,500+ | High-volume production, established businesses, larger projects | OMTech Maker 60–100W, OMTech Galvo/MOPA Fiber | Deep wood cutting, clear/white acrylic, glass, large sheets, high-volume production; fiber models handle bare metals | Larger footprint, greater ventilation/cooling requirements, higher investment |
Choosing a Home Laser Engraver: Why Material Compatibility Matters
When choosing a home laser engraver, the primary material you plan to work with dictates the laser wavelength you need, and that wavelength entirely controls whether the laser light is absorbed by the material (and does its job) or passes harmlessly right through it.
Every laser type operates on a specific light wavelength, and materials react to those wavelengths very differently:
- Diode Lasers (450nm visible blue light): Great for dark woods, leather, and dark plastics.
- CO2 Lasers (10,600nm far infrared): This wavelength is heavily absorbed by organic materials. It treats clear acrylic, glass, wood, and stone as solid, workable targets.
- Fiber and Infrared Lasers (1,064nm near infrared): This wavelength interacts efficiently with the mobile electrons in metal, vaporizing bare metal, anodized coatings, and hard plastics instantly.
Laser Engravers for Home: Material Compatibility Matrix
| Material Type | Diode Laser (450nm) | CO2 Laser (10,600nm) | Fiber / IR Laser (1064nm) |
| Wood and Leather | Excellent for engraving, slow at cutting | Gold standard for high-speed cutting & engraving | Will not work (passes through / chars poorly) |
| Clear and Colored Acrylic | Cannot do clear/white; can cut dark colors slowly | Gold standard; cuts all colors and clear cleanly | Will not work (passes through) |
| Anodized Aluminum | Excellent (bleaches the colored dye) | Excellent (bleaches the colored dye) | Excellent (can deeply engrave the metal) |
| Bare Metals (Steel/Alum.) | Will not work (requires temporary paint/spray) | Will not work (reflects almost completely) | Gold standard for permanent, deep engraving |
| Glass and Ceramics | Requires surface coating (black paint/tape) to mark | Engraves directly with a beautiful frosted look | Marks specific dense plastics/ceramics only |

Which Laser to Choose for Your Home Setup
- Choose a diode Laser if: your main goal is engraving wood crafts, leather patches, cutting thin plywood, or marking dark plastics on a budget. Diodes are highly compact, air-cooled, and perfect for casual home crafting.
- Choose a CO2 Laser if: you want to make custom acrylic signage, complex layered wood art, or engrave glassware. If you plan to sell acrylic goods, a CO2 laser is essentially mandatory for your workspace.
- Choose a fiber / IR Laser if: you're focused on jewelry, custom knives, marking bare metal tools, or engraving polymer items. OMTech's Galvo and MOPA fiber lasers are built specifically for this niche and scale from hobby-level 30W units up to 100W machines capable of color marking on metal.
- Choose a hybrid dual-source Laser if: you want one machine that can handle both sides. Modern desktop units, like the OMTech Solis Duo (50W fiber + 40W diode), offer swappable heads or dual beams in one cabinet, so you can engrave a wooden board and a bare metal ring on the same machine without buying two separate lasers.
Wood Laser Engravers For Home vs Metal Laser Engravers For Home
| Feature | Wood Laser Engravers | Metal Laser Engravers |
| Laser Technology | Diode (450nm blue) or CO₂ | Fiber / IR (1064nm), including MOPA |
| Best For | Wood, leather, cork, acrylic, paper | Steel, brass, aluminum, silver, gold, hard plastics |
| Metal Engraving | Limited to coated, painted, anodized metals or marking spray | Excellent for bare metals |
| Metal Marking | Coated/anodized metals | Deep, permanent marking and engraving |
| Ease of Use | Beginner-friendly, especially diode lasers | More specialized |
| Typical Home Use | Crafts, signs, gifts, leather goods, acrylic projects | Jewelry, tools, metal products, industrial-style marking |
| Main Limitation | Cannot directly engrave raw bare metal | Poor choice for thick wood cutting |
| Popular Models | OMTech K40+, xTool S1, xTool P2, | ComMarker B4, OMTech Galvo, xTool F2 Ultra |
| Best Choice If... | You primarily work with wood, acrylic, leather, and similar materials | Your main focus is bare-metal engraving and marking |
Setting Up a Home Laser Engraver: Why Space and Ventilation Matter
When setting up a laser engraver at home, it's important to understand that space and ventilation aren't optional accessories; they're the core safety boundaries that dictate what kind of machine you can legally, safely, and comfortably operate.

1. Account For Particulate and Gas Toxicity
Every time a laser fires, it doesn't just burn a line; it vaporizes material into an ultra-fine, microscopic cloud of toxic particulates, volatile organic compounds (VOCs), and thick smoke. Failing to plan for this will damage your home's air quality, coat furniture in yellow residue, and create real respiratory hazards.
- Laser-cutting wood produces wood smoke and wood tars.
- Cutting acrylic releases methyl methacrylate, which has a sharp chemical smell and can cause rapid headaches.
- Accidentally burning the wrong plastic (like PVC) releases hydrogen chloride gas, which is highly corrosive to both lungs and machine metal.
2. Get Machine Footprint and Support Equipment
A laser engraver is rarely just the machine itself. Your physical space needs to accommodate:
- The laser unit: desktop diodes take up small desk spaces, but CO2 cabinet lasers have a much larger footprint.
- The cooling system: CO2 lasers require a water chiller (like a CW-5200) or, at minimum, a water bucket next to the machine.
- The air assist: an air pump or compressor that blows air at the laser nozzle to clear smoke and improve cut quality.
- The exhaust fan: a dedicated inline duct fan to pull smoke out of the machine and out of your space.

Choosing a Laser Engraver For Home: Ventilation vs. No Ventilation
1. If You Have Good Ventilation Options
If you have a clear path to vent smoke outside a dedicated window, a garage door, or a workshop wall, you can drill a 4-inch vent hole; you have total freedom over which machine type you choose (diode, CO2, or fiber), but you still need a proper exhaust strategy.
Place the inline fan as close to the window or exit point as possible, not right next to the laser. This creates negative pressure throughout the length of the ducting, so if the hose develops a tiny pinhole leak, air pulls into the hose rather than pushing toxic smoke out into the room.
If You Have No Ventilation Options
If you're in an apartment, a windowless basement, or an HOA neighborhood where venting thick acrylic smoke outside would cause complaints, your machine choices and operating costs change significantly.
- You must use a fully enclosed Class 1 laser, such as an OMTech cabinet unit or an xTool S1. Open-frame, unenclosed gantry lasers are strictly unsuitable here, since you cannot trap the fumes.
- Even with a $500+ fume extractor, you should severely limit what you cut stick almost entirely to light wood engraving and anodized metal marking, and avoid cutting thick plastics, acrylic, or MDF.
- MDF's glues and formaldehydes will saturate and ruin expensive charcoal filters within hours, making the setup far more costly to maintain.

Quick Home Setup Decision Guide
- Spare bedroom or living space: Choose an enclosed diode laser (like the xTool M2) paired with a high-end fume extractor. Keep projects small and stick to light engraving.
- Garage or basement with a window: Choose a CO2 laser, a high-power diode, or a compact CO2 unit like the OMTech K40+. Hook it up to an inline fan and vent it straight out the window using a custom window dryer-vent insert.
- Detached shed or workshop: You have full freedom here. A large CO2 cabinet laser, such as one from the OMTech Maker or Pronto lines, paired with an external blast gate and a high-flow exhaust system, is ideal.
To choose the perfect home laser engraver, look at how budget, material compatibility, and your specific ventilation setup intersect. Buying a machine that can't process your materials or can't be safely vented in your space leads to buyer's remorse at best, and health hazards at worst.
Key Home Laser Engraver Tips
- Safety first: Avoid open-frame lasers if you have pets or kids nearby, unless you pair one with a dedicated enclosure, safety glasses matched to the laser's wavelength, and an active exhaust hose venting outside.
- Software standard: Most experienced users recommend LightBurn for control, though it has a steeper learning curve than simple manufacturer apps. Several OMTech machines, including the K40+, Polar Lite, Maker, and Pronto lines, offer LightBurn bundles at checkout.
- Material limits: Diode lasers excel at wood, leather, and acrylic cutting/engraving, but you'll need an infrared (IR) or fiber laser module (like OMTech's Galvo or MOPA series) to mark bare metals directly.
Final Thoughts on Laser Engravers For Home
The "best" home laser engraver isn't a single machine; it's whichever model matches your budget, your materials, and the ventilation your space can actually support. A beginner engraving leather patches in a spare bedroom has very different needs from an Etsy seller cutting clear acrylic signage in a garage, and buying based on price alone (without checking material compatibility and airflow) is the fastest way to end up with a machine that can't do the job you bought it for.
Start by answering the three questions at the top of this guide, match your answers to one of the three tiers above, and confirm your space can safely vent whatever laser type you choose. Get those three things right, and the specific model becomes a much easier decision, whether that's an entry-level diode laser for casual wood and leather projects, a mid-range CO2 machine for signage and drinkware, or a small-business-grade cabinet laser (or fiber engraver, for metal work) built to run day after day.
You may also be interested in this complete guide on how to laser engrave safely at home.