Laser Engraving Powder-Coated Tumblers in the UK
The first powder-coated tumbler most UK makers engrave comes out wrong in one of three ways. The text climbs across the cup. One side is darker than the other. Or it looks fine when it ships, and the coating starts lifting by the time the customer has run it through the dishwasher twice.
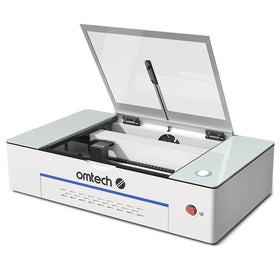
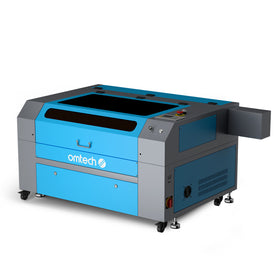
Almost none of that is the machine's fault. It is the rotary setup, the circumference number, and the heat you put into a coating that was never designed to absorb it. Get those three right and a £12 blank becomes a £25–£40 gift-shop product, or a £35–£80 personalised piece if the design carries a name, a town, or a small business logo. If you are still comparing CO₂ laser machines for a UK workshop, the tumbler job is one of the most repeatable ways to justify the bench space.

This guide is written for the British small business: a 50–60W desktop CO₂ laser in a spare room, a garden office, or a unit on a small industrial estate, a rotary that actually fits the blanks you sell, and the testing sequence that separates a repeat order from a refund. The UK small business guide on OMTech covers the wider setup, insurance, and HSE context if this is your first machine.
What You Need Before the First Cup
- A CO₂ laser in the 50–60W range. A desktop enclosed unit handles powder-coated drinkware all day, and the rotary should be part of the package rather than a separate purchase. If you are buying a used machine, check the tube hours and the lens condition before you worry about wattage — a tired 60W cuts worse than a healthy 50W.
- A rotary sized to the blanks you sell. The two common styles are a four-wheel roller and a jaw chuck. The roller is more forgiving for a 20oz straight tumbler; the chuck is more precise for a short, rigid part. Which one you need depends on the blanks in your stock, not the one cup on your desk.
- Powder-coated blanks. A CO₂ beam at 10.6μm does not mark bare stainless in a way that survives handling. It removes the coating and exposes the metal. Bare steel needs fiber, or a laser marking spray on CO₂ — and marking spray adds a consumable cost per cup that changes your margin. Powder-coated tumblers are one of the few drinkware surfaces a CO₂ machine can mark cleanly and repeatably.
- Calipers, a spirit level, 91% isopropyl alcohol, and a melamine sponge. The calipers matter more than most tutorials admit, because the same “20oz” blank from two UK suppliers can measure differently at the engraving line.
- Masking tape, for the brown-halo problem that shows up on light-coloured powder coat.
UK compliance, in plain terms
Commercial laser equipment in the UK sits under BS EN 60825-1 for laser safety, and if you employ staff or have customers on site, the Health and Safety Executive (HSE) expects a risk assessment, adequate ventilation, safety signage, and maintenance records. For a home workshop in a spare room or garage, the practical minimum is wavelength-matched eyewear, an enclosure or interlock that actually works, and fume extraction that vents outside. The UK small business guide covers COSHH, insurance, and PAT testing in more detail. If you are importing blanks from outside the UK, remember that VAT at 20% applies to the landed value, and the courier’s handling fee is a separate line on the invoice.
Two Rotary Styles, and Which One Your Cup Needs
| Spec | Four-wheel roller | Jaw chuck |
|---|---|---|
| How it holds the cup | The barrel rests across two pairs of rollers; friction drives the rotation. | Three jaws clamp one end; the cup cantilevers out and hangs free at the other end. |
| Fits | Roughly 10–150 mm diameter, 50–350 mm length | Roughly 5–80 mm diameter |
| Best for UK blanks | 20oz and 30oz straight tumblers, tapered travel mugs, full-wrap designs, heavy blanks | Lids, rings, small cylindrical parts, pen barrels |
| Where it lets you down | Heavy or heavily tapered blanks can slip at higher speeds, producing wavy text on the back of the cup. | Long cups droop at the unsupported end, so focus drifts along the design and one end comes out lighter. |
On a roller rotary the cup lies horizontally and the beam works on the top of the barrel; the two contact lines sit underneath, out of the beam but still pressing on the coating. On a chuck the cup is rigid at the jaw end and unsupported at the far end. A roller is more forgiving for a full-wrap tumbler; a chuck is more precise for a short, rigid part. Most UK gift-shop work — names, town names, small logos for farm shops and cafés — starts on a roller with a 20oz straight blank because it is the most repeatable combination.

Set Up the Rotary in LightBurn, in This Order
- Level the machine and the rollers. Check both axes with a spirit level. A bench that is level front-to-back but off side-to-side is the most common cause of climbing text, and it is invisible until you put a level on it.
- Measure the blank at the engraving line, in millimetres. Do not trust the supplier's nominal diameter. Calipers at the exact height the beam will strike the cup. A tapered travel mug changes diameter over the design height, so the number you enter is a compromise — keep the design narrow enough that the compromise does not show.
- Enter the rotary type and mm per rotation in LightBurn. Run a small test square. If the square comes back stretched or squashed, the circumference is wrong; if the square is the right shape but the text still drifts, the problem is mechanical (roller slip or jaw runout), not the software number. The laser basics guides cover the rotary panel and the origin settings step by step if this is your first time inside the software.
- Focus on the contact line. On a roller, that is the top of the barrel. On a tapered cup, focus at the centre of the design and accept that the edges will fade if the design is too wide for the depth of field.
- Run a wrap test on a scrap blank, not the customer's cup. One line of text that goes all the way around, so you can see the closing seam before the order is finished. Two minutes on scrap is cheaper than remaking a £40 retail cup.
- Tension the rollers or tighten the jaws. On rollers, tight enough that the cup cannot slip during a direction change, loose enough that the powder coat is not dented. On a chuck, clamp on a part of the cup that stays hidden or is outside the finished design.
Settings, and How to Test Them Before They Cost You an Order
These are a working window for powder-coated blanks on a 50–60W CO₂, not a universal recipe. Coating thickness varies between suppliers and even between batches. The test below matters more than the table, especially if you are buying blanks from a UK distributor who rebrands an import.
| Parameter | Working window | Why it matters on a coated tumbler |
|---|---|---|
| Power | 15–30% | Glass tubes have a firing threshold around 10–15%; RF tubes fire lower. Above 30% you start heating the steel under the coating, which weakens the bond and causes delayed peeling. |
| Speed | 100–350 mm/s | 300–350 mm/s is normal on a light straight blank. Heavy or tapered cups slip above roughly 250 mm/s, and that is where wavy text comes from. Roller tension, not the speed number, sets the ceiling. |
| Passes | 1–2 | Two light passes at moderate power almost always beat one 30% pass, because the second pass does not add as much heat to the coating interface. |
| Line interval | 0.06–0.1 mm (roughly 254–400 DPI) | Denser intervals concentrate heat. On thin powder coat, going tighter than 0.06 mm raises the risk of a mark that looks fine on Friday and peels by Tuesday. |
| Overscan | 2–3% | Stops the stutter mark where the scan direction reverses, which is more visible on a dark coating than on bare metal. |
The four-square test for a new UK blank
Take one scrap of the brand you are about to run and engrave four 20 mm squares: 15% / 350 mm/s, 20% / 300, 25% / 250, 30% / 200. Pick the one that gives the colour you want with the least heat. Then let the blank sit for 48 hours before you ship anything from that batch. The square that still looks the same after two days is the starting point for that blank. Write the numbers on the cup with a Sharpie and keep it next to the machine. If you switch suppliers — even to a cheaper UK distributor — run the test again, because the coating is the variable nobody lists on the product page.
Two adjustment rules worth writing on the machine: if the mark is dark or blotchy, raise speed before dropping power; if the edges look soft or a halo appears, raise speed toward 350 mm/s before changing anything else. Power affects the coating bond more than speed does. Heat is the enemy, and speed is the fastest way to reduce heat without losing the mark.

The Coating Problems That Show Up Days Later
Text climbing or coming out wavy
Slippage, almost every time. The cup is rotating faster than the roller can hold, the rollers are not level, or the circumference number is off. Slow down, re-level, then re-measure. It is rarely the design file, and it is almost never the laser tube.
Uneven darkness across the design
Focus is off the contact line, or the cup is tapered. On a tapered tumbler, focus at the centre of the design and keep the art narrow. A full-wrap on a heavily tapered cup will fade at the edges no matter what settings you use, because the surface is leaving the depth of field. Quote that job as a trial run, not a production item.
Coating peeling after a few days
Heat input, in three forms: power too high, speed too slow, or line interval so tight the beam keeps re-entering the same strip of coating. Heat conducts sideways under the coating and weakens the bond around the mark. Lower the power, open the interval toward 0.1 mm, and check the result 48 hours after engraving before the order ships. A cup that peels after it leaves the shop is a refund, a review, and a customer who does not come back.
Brown halo — and how to tell which kind you have
Not every halo is the same problem, and the fix is different.
- Scorching beside the design (brown or black edges from stray energy): tape the surface with masking tape before engraving and peel it after. The tape absorbs the stray energy before it reaches the coating.
- Brown discoloration on exposed metal: usually oxidation, not burnt coating. A low-power cleaning pass over the mark often fixes it better than more tape or less power.
Cheap test first: re-run the same file at the same settings on a scrap blank with tape, and compare under the same light.
Clean-Up Is Part of the Process, Not an Extra Step
When the laser stops, the engraved area is covered in carbonized coating residue. It looks grey and dull, and beginners read that as “the laser did not cut deep enough” and crank the power on the next cup. Do not do that. The residue is on the surface, not a sign of insufficient depth.
Scrub the mark with 91% isopropyl alcohol and a melamine sponge. The bright metal shows up in seconds. Wear gloves — skin oils settle into a fresh mark and darken it over time. Work in a ventilated area away from any ignition source; high-concentration IPA flashes off fast and the vapour is flammable. In a small UK workshop in winter, where the window is closed, ventilation is not optional.
Tapered Tumblers and the Honest Trade-Off
Straight 20oz skinny tumblers are the beginner-friendly product: predictable, repeatable, and easy to price. Tapered cups look better on a gift-shop shelf and are harder to run. The surface curves away from focus, so a wide design fades at the edges. A four-wheel roller handles a taper better than a chuck, but no attachment fixes a design that is too wide for the curve. Keep designs short and centred, or quote full-wrap work on a tapered blank as a trial run rather than a finished product.

If You Plan to Sell Them in the UK
Tumbler work is repeat business: teachers, nurses, local sports clubs, weddings, corporate gifts, and the gift-shop market that sells a town name or a landmark to a visitor. Etsy UK and Not on the High Street listings for personalised engraved tumblers commonly sit in the £30–£80 range, with gross margins of 45%–70% reported by sellers who run their own blanks and settings. A studio in Manchester or a workshop in Edinburgh selling single engraved tumblers at £25–£40 with text included is a useful reality check on where the retail ceiling sits for a straightforward name job.
Operationally, once your settings card is dialled for a given blank, time per cup drops to minutes. That is what makes a 12-piece gift-shop order worth taking. Budget for the UK tax layer: equipment and blanks imported from outside the UK attract VAT at 20% on the landed value, and the courier’s handling fee is a separate cost. If you are not VAT-registered, that VAT is a real cost, not a recoverable one — which changes the margin calculation on cheaper imported blanks. The UK small business guide covers the registration threshold and the insurance requirements in more detail.
The Last Check Before a Cup Goes in the Box
Rotate the finished cup slowly under a lamp and look at two places. Both are outside the design, and both are easy to miss if you only look at the artwork head-on.
The closing seam. A wrap design starts at one point on the circumference and comes back around to it. If the circumference entered in LightBurn is off by a fraction of a millimetre, that join shows as a thin strip of untouched coating or a slightly darker band where the two passes overlap. It is usually on the back of the cup. Find it before the customer does. If you can see it, re-measure the diameter and re-run.
The roller band. The rollers were pressing on the coating the whole time they were turning the cup. On thick or soft powder coat they can leave a dull, slightly polished line exactly where they sat. It is outside the design, which is why it gets missed, and on a matte blank it is the most visible defect on the finished piece.
Then pack accordingly: set each cup in its slot with the seam and the roller band facing up, toward the lid, so nothing presses on them and nothing rubs across the mark in transit. Paper or a thin foam sheet between stacked cups. One cup per slot if the order is going by Royal Mail or a courier.
Before the next UK order
Build the settings card. Then build the business.
Engrave one blank from each brand you stock, write power, speed, and line interval on the cup with a marker, and keep that card next to the machine. If text still climbs at the higher speeds, the problem is in the mounting — roller level and tension — not the file.
Explore laser machines at OMTech UK →If you are still choosing a machine, start from the CO₂ laser range on omtech.uk rather than a single model. The right one depends on whether you are doing five cups a week for a local gift shop or fifty a day for a corporate contract — and whether the bench is in a spare room or a unit with three-phase power.