What is Line Density in Laser Engraving?
If you have just got a laser engraving machine, or are new to laser engraving, line density is one of the first features or settings you must master fully. In laser engraving, "line density," also often referred to as LPI (lines per inch), DPI (dots per inch), or line interval, is a setting that defines how close the laser burn lines will be to each other.
Higher density packs lines tightly to provide detail, while lower density spaces them out. To describe it a little more visually, it refers to how closely packed the laser's horizontal burning passes are as it sweeps back and forth to fill a shape or image.
You can think of the laser as a microscopic paintbrush: line density determines how much each brushstroke overlaps with the previous one. The more overlap there is, the more detail you get, and vice versa.
 How Does Line Density Work In Laser Engraving?
Again, line density controls how close the laser's parallel raster passes are to each other. Higher density packs lines tightly for sharp detail, while lower density spaces them out. Going too high causes overlapping burns and over-burning, while too low leaves visible stripe lines.
It's measured either by how many horizontal scan lines the laser burns per vertical inch, or by the physical spacing interval between lines (e.g., 0.1 mm).
- Low Density (Low LPI / Large Interval): Speeds up jobs and prevents melting on sensitive materials, but when density is too low, it also creates a visible striped or scan-line texture.
- High Density (High LPI / Small Interval): Fills in gaps for smooth gradients and fine photo details.
Is Higher Line Density Always Better?
It is very important to understand that higher line density is not always better in laser engraving. The advantage of higher line density is that it creates a darker and more solid fill, but the downside is that it can also cause wood to burn, acrylic to melt, fine details to blur, and the engraving process to take much longer than needed.
Setting DPI/LPI past 300 to 500 on materials like wood or acrylic offers diminishing returns and can cause unwanted charring or deep grooves. Finding the perfect line density means balancing quality, material type, and execution time.
Why High Line Density is Not Always Better
- Overburning: Too many lines in a small space put too much heat on the material. Melting: Plastics and acrylics can warp or melt from the extra heat.
- Loss of detail: Lines can overlap and blur sharp edges or fine text. Time Wasted: More lines mean the job takes a lot more time to finish.
When to Use High Line Density
- Dark engravings: You want a deep, dark mark on wood or leather.
- Vector fills: You need a solid, bold block of color or engraving.
- Dense materials: You are working with hard metals or stone that need extra passes.
When to Use Lower Line Density
- Delicate materials: You are engraving thin paper, fabric, or delicate wood.
- Meltable plastics: You want to stop acrylic edges from bubbling or melting.
- Fast drafts: You want a quick test burn to check your alignment and focus.
How Is Line Density Used? Too High vs. Too Low
| Line Density Type | Visual Result | Pros & Cons | Reddit Consensus / Use Cases |
| Too Low (e.g., < 0.15mm interval / < 150 DPI) | Distinct, visible horizontal "zebra" ridges or corduroy textures. | Very fast engraving speeds. Looks blocky and low-res. | Best used for quick draft signs or cutting down machine wear. |
| The Sweet Spot (e.g., 0.1mm interval / 254–300 DPI) | Crisp, completely solid fill where lines blend perfectly together. Smooth gradient tones. | Balanced machine time. | Reddit's universal default for wood, leather, and general acrylic. |
| Too High (e.g., < 0.05mm interval / > 500+ DPI) | Heavy overlap. The laser burns over already charred material. | Massive job times. Causes deep burning, warping, bleeding, or melting. | Only used for fiber laser metal etching or extreme micro-details. |
How Is Line Density Displayed in Different Software? DPI vs. Line Interval vs. LPMM
One very important thing to note about line density in laser engraving is that it might be displayed differently depending on which software you use. Depending on whether you use LightBurn, xTool Creative Space, or LaserPecker, line density can be seen in different ways:
- Lines Per mm / Inch (LPMM / LPI): The literal count of laser lines packed into a single unit of distance.
- Line Interval: The distance between the centers of two consecutive lines (measured in millimeters). Lower interval means higher density.
- DPI (Dots Per Inch): In raster/photo engraving, this dictates how many micro-burns occur per inch.
Explore more on what DPI is, and how it improves laser engraving results
 Line Density Settings For Different Types Of Laser Engravers
The ideal line density settings differ depending on the type of laser you choose. This is because each laser type creates a completely different physical beam size (spot size). If you match your line interval perfectly to the width of your laser beam, the lines touch edge-to-edge without overlapping or leaving gaps.
1. Diode Lasers (Engraving Hobbyists)
Diode laser engravers are the most common desktop units (e.g., xTool, Creality, Ortur), and diode laser beams are physically shaped like a rectangle or oval, not a perfect circle. A typical spot size is roughly 0.08 mm × 0.15 mm.
Benchmark Line Density Settings For Diode Lasers
Because the beam is wider in one direction, your line density settings change depending on whether your laser is moving left-to-right (X-axis) or front-to-back (Y-axis).
- Standard Interval: 0.1 mm
- DPI Equivalent: 254 DPI
If you push a diode past 300 DPI (0.08 mm interval), the rectangular beams stack heavily on top of each other. This results in heavy charring, smoke stains, and muddy details.
2. CO2 Lasers (Small Business and High Production)
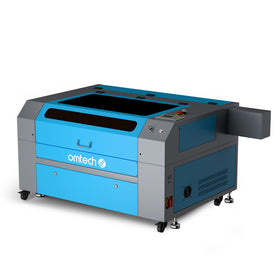
CO2 laser beams are perfectly round and highly focused, usually measuring around 0.1 mm to 0.2 mm depending on the focal length of the lens you install. Because the beam is perfectly uniform, you get incredibly predictable results whether engraving vertically or horizontally.
CO2 beams also vaporize organic materials (like wood) instantly instead of burning them, allowing for cleaner overlaps.
Line Density Settings Benchmark
- Standard Interval: 0.08 mm to 0.12 mm
- DPI Equivalent: 250 to 300 DPI
CO2 laser engravers cut through material fast. If your line density is too tight, you will end up unintentionally cutting or deeply "pocketing" into the wood rather than just marking the surface.
3. Fiber and MOPA Lasers (Industrial Metal Marking)
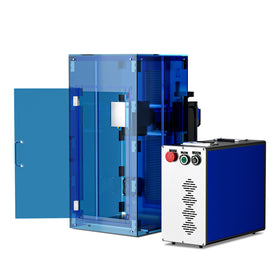
Fiber laser engravers have a microscopic, hyper-focused spot size, often ranging from 0.01 mm to 0.03 mm. Because the beam is ten times smaller than a diode or CO2 laser, you require a radically higher line density to get a solid fill.
If you used a standard "wood setting" (0.1 mm) on a fiber laser, you would just engrave individual pinstripes with massive metal gaps between them.
Line Density Settings Benchmark
- Standard Interval: 0.01 mm to 0.03 mm
- DPI Equivalent: 800 to 2500+ DPI
Fiber lasers rely on high line density to build up the surface heat needed to "anneal" (darken) steel. If your density is too low, the metal will just look lightly scratched instead of a premium black or colored finish.
Line Density Settings Chart For Different Laser Engravers: Reference Guide
| Laser Type | Average Spot Size | Ideal Line Interval | Ideal DPI Fill |
| Fiber | 0.02 mm | 0.01 mm – 0.03 mm | 800 – 2500 DPI |
| CO2 | 0.12 mm | 0.08 mm – 0.12 mm | 250 – 300 DPI |
| Diode | 0.15 mm (Oval) | 0.10 mm – 0.15 mm | 170 – 254 DPI |
Ideal Line Density Settings For Different Materials
Different laser engraving materials react uniquely to heat, and this matters when you are deciding on your line density settings. There is only a certain number of times you can overlap laser lines before different materials burn, melt, or blur. As an example, a line density setting that creates a crisp engraving on glass will completely ruin a piece of leather or wood.
1. Line Density Settings For Organic Materials (Wood, Leather, Cork)
- The line density rule: Low to Moderate Density. You want the laser lines to barely touch or leave a microscopic gap, letting the natural bleed fill the space.
- Baseline settings: 0.08 mm to 0.12 mm interval (approx. 200 to 300 DPI).
The line density has to be minimal because organic materials suffer from heat bleeding, meaning the heat from one laser line automatically spreads sideways into the next.
Also, cellulose fibers and natural oils trap heat. Too much overlap causes the wood to smolder, turning a clean engraving into a blurry, muddy mess. The line density rule is low to moderate density.
You want the laser lines to barely touch or leave a microscopic gap, so that the natural bleed fills the space. Softwoods (like pine) bleed heat heavily and need lower density. Hardwoods (like walnut or cherry) can handle slightly tighter intervals for crisper details.
Explore more on laser engraving and cutting wood.

2. Plastics (Acrylic, Rowmark, Delrin)
- The line density rule: Moderate Density. You need just enough density to create an even, frosted appearance without overheating the plastic.
- Baseline settings: 0.06 mm to 0.10 mm interval (approx. 250 to 400 DPI).
Cast acrylic turns into a frosty white powder when engraved, while extruded acrylic melts. If you pack the laser lines too close together, the trapped heat accumulates and creates a messy, gummy pool of melted plastic instead of a clean, frosted engraving.
Hard and Brittle Materials (Glass, Slate, Ceramic)
- The Line Density Rule: Moderate to High Density. You want tight lines to get a solid, uniform fractured look.
- Baseline Settings: 0.06 mm to 0.08 mm interval (approx. 300 to 400 DPI).
Pro-tip: For laser engraving glass, what some people do is place a wet paper towel over the engraving area. This absorbs excess heat, letting you use a higher line density for a smoother look without fracturing the glass too deeply.
These materials do not burn or melt; the laser fractures their surface on a microscopic level. Glass and stone are terrible at conducting heat. The laser causes tiny micro-fractures (shattering the glass surface slightly). If your lines are too far apart, you will see a rough, jagged edge. If they are too close, the glass will chip, flake away, and lose all detail.
Explore more on laser engraving stone as a beginner.
Metals (Anodized Aluminum, Bare Steel, Brass)
- The line density rule: High to extreme density. Because metal molecules don't bleed or melt easily, you can pack lines incredibly tight to get solid blacks or deep 3D depth.
- Baseline settings: 0.01 mm to 0.05 mm interval (approx. 500 to 2500+ DPI).
Metals are highly conductive and have incredibly high melting points compared to organics or plastics. For anodized aluminum, the laser simply bleaches or vaporizes the dyed anodized layer, exposing the silver aluminum underneath. It can handle very tight lines because it doesn't bleed.
For bare steel (fiber lasers), the laser relies on dense, repeated heat to physically alter the metal or create an oxide layer (annealing).
Baseline Line Density for Different Materials: Quick Cheat Sheet
| Material | Reaction to Laser | Density Risk | Recommended Interval |
| Wood / Leather | Burns / Chars | Blurring, charcoal texture, fires | 0.10 mm (254 DPI) |
| Acrylic | Melts / Vaporizes | Melting, losing sharp edges | 0.08 mm (318 DPI) |
| Glass / Slate | Micro-fractures | Flaking, chipping, rough texture | 0.06 mm (423 DPI) |
| Metals | Bleaches or Oxidizes | Lines looking like separate stripes | 0.02 mm (1270 DPI) |
How Does Line Density Work? Tips for Line Density
1. Don't Go Tighter Than Your Laser's Spot Size (Kerf).
If your laser beam dot is 0.1mm wide, setting your line interval to 0.05mm means you are overlapping by 50%. This does not add detail; it just digs a deeper hole and chars the material.
2. The Material Dictates Density
- Wood/Leather: Stick to 250–300 DPI (0.1mm–0.08mm interval). Wood fibers naturally bleed heat, so higher density just causes messy charcoal texturing.
- For acrylic or glass, use (300–400 DPI) to avoid jagged edges on the hard material.
- Fiber ulcers often require incredibly dense lines (600–1000+ DPI) to physically alter the metal's surface reflectivity.
3. Use The "Defocus" Trick for Smooth Fills
Experienced laser engraving experts use something called the "defocusing trick" for smooth fills. This is where you defocus your laser lens (moving the bed up or down 1–2mm) if you want a buttery smooth, solid fill background without increasing your line density. It broadens the beam slightly so the lines melt together beautifully without adding extra time to the job.
4. Always run a quick "Material Test Matrix"
Use the Material Test Matrix (it is built into software like LightBurn) on a scrap piece of your exact material before running a massive project. It will save you hours of wasted burn time.
Final Thoughts on Getting Line Density Right, Every Time
Line density is one of those settings that looks small on screen but changes everything about the final result; the difference between a crisp, professional engraving and one that's charred, blurry, or full of visible stripe lines often comes down to nothing more than this one number.
The key takeaway is that there's no single "correct" setting: the right line density depends on your laser type (diode, CO2, or fiber), the beam's physical spot size, and how the specific material you're working with responds to heat. Start from the benchmark settings above, run a quick test matrix on scrap material before committing to a full project, and adjust from there.
Once you've dialed in the right density for your machine and material combination, it's worth saving as a preset; you'll be reaching for it again on every future project.
You may also be interested in this complete guide on optimal DPI settings for OMTech wood engraving.