How to Make Laser-Engraved Wooden Pet ID Tags
A pet ID tag only has one job: staying legible and attached long enough to get a lost pet home safely. Vinyl stickers peel, printed ink fades in the rain, and stamped metal tags can look generic. Laser-engraved wood solves all three problems at once; the text is burned directly into the material instead of sitting on top of it, so it won't scratch off, peel, or fade the way surface-level printing does.
To make laser-engraved wooden pet ID tags, you need to use high-density hardwoods like walnut, maple, or cherry, apply a laser-safe masking tape before cutting, and thoroughly seal the finished tag with a waterproof clear coat.
Generally, you can either use a standard diode or CO2 laser for this project: the process is quite similar, and the requirements (apart from the laser itself) are quite similar.

Required Materials and Tools
| Item | Purpose |
| Wood blanks | 1/8 inch (3mm) hardwood or high-quality birch plywood. Avoid softwoods like pine, which char heavily and can warp easily |
| Laser masking tape | Paper transfer tape to prevent smoke stains on the wood surface |
| Hardware | Split rings and small metal eyelets/grommets to reinforce the hanging hole |
| Sealant | Outdoor-grade polyurethane, Helmsman spar urethane, or epoxy to protect against water and scratches |
| Software | Design programs like LightBurn |
Making Laser-Engraved Wood Pet ID Tags: Step-by-Step Production Process
1. Design and Layout
The layout stage is where you set up the two layers your laser will treat differently: a cut line for the tag's outer shape, and a fill layer for anything that needs to be engraved rather than cut through.
- Open your design software (e.g., LightBurn).
- Create an outer shape for the tag (circle, bone, or shield) set to a Line (Cut) layer.
- Draw a small 3mm to 4mm hole near the top for the hardware.
- Add your text (pet's name on the front, phone numbers on the back) and set it to a Fill (Engrave) layer.
- Use bold, sans-serif fonts so the contact information remains legible even if the tag gets lightly scratched.
2. Material Preparation
- Sand your wood blank with 220-grit sandpaper until completely smooth.
- Apply paper masking tape firmly over both sides of the wood, using a squeegee to remove air bubbles. This blocks smoke and resin from staining the wood during the process.
3. Laser Settings (General Guidelines)
Because laser power varies enormously between machines (e.g., 5W vs. 20W vs. 40W), always run a small test matrix first rather than assuming a setting will transfer directly from one laser to another.
| Layer | Goal | Example (10W Diode) |
| Engraving (Fill) | Medium speed, low-to-medium power for a dark, clear mark without burning too deep | 300 mm/s speed, 30% power, 300 DPI |
| Cutting (Line) | Low speed, high power to cut cleanly through the blank | 4 mm/s speed, 80–90% power, 1 pass |
4. Execution and Jigs
- Place your masked wood into the laser bed.
- If you are making multiple tags, you must get a 3D-printed or laser-cut cardboard grid/jig to quickly drop blanks into place without repositioning your laser file every time.
- Run the engrave layer first, followed by the cutout layer.
5. Post-Processing and Weatherproofing
This is the step that determines whether your tag survives a summer of swimming and mud, so don't rush it.
- Peel off the burnt masking tape. Use a bit of Gorilla tape or a plastic weeding tool to easily pull up small pieces.
- Clean any residual soot using a toothbrush dipped lightly in isopropyl alcohol.
- Crucial step: Because dogs scratch, swim, and run through mud, you must heavily seal the wood. Dip the tag or apply 3–4 thin coats of outdoor spar urethane. Allow it to dry completely between coats.
- Press a small metal eyelet/grommet into the hanging hole using an eyelet tool. This prevents the metal split ring from wearing through the wood over time.
 Important Tips for Making Wood Pet ID
- Material choice: Choose hardwoods like beechwood, walnut, or maple so the text stays sharp and the tag does not snap easily under wear.
- Sealing the wood: Apply a water-resistant sealant (like polyurethane or beeswax) so moisture, rain, or swimming pool water won't warp or ruin the engraving over time.
- Both sides: Engrave the pet's name on the front and your phone number/address on the back to maximize safety info.
- Jigs and alignment: Make a simple cardboard or MDF jig on your laser bed to quickly align multiple blank wooden tags in a batch.
What Laser Engraving Machine Do You Need for Wood Pet ID Tags?
You can easily laser engrave wooden pet ID tags using a basic diode or CO2 laser, which burns dark, high-contrast text into natural wood blanks. Both of these machines will do nicely; it is more efficient to choose based on which is best for the wood you are working with and the volume of pet ID tags you intend to make.
There is usually no debate when it comes to diode vs. CO2 laser engravers for making wooden pet ID tags. That is because both of these machines work, but on different scales. Because pet ID tags are small (typically under 2 inches) and utilize thin 1/8-inch hardwoods, both laser types are highly capable, but they offer distinct trade-offs in finish quality, speed, and cost.
| Diode Laser | CO2 Laser | |
| Best for | Low-volume, hobbyist creators | Commercial-scale production |
| Strengths | Burning wood, cutting shapes, lightweight tags; low cost | Faster cutting, crisp deep engraving on organic materials like beechwood, walnut, cherry |
| Limitation | Cannot cut clear or translucent acrylic (blue light wavelength) | Higher upfront cost, larger footprint |
A diode laser is clearly the better choice if you are a low-volume and/or hobbyist creator making wood pet ID tags. However, if you run a business and are making wood pet ID tags on a commercial scale, a CO2 laser engraver is obviously the better option.
3 Advantages of CO2 Lasers for Wood Tags
If your primary goal shifts from a fun hobby to running a high-volume Etsy store, you must pivot to a CO2 laser engraver. For projects like wood tags, a CO2 laser engraver provides three clear advantages: more speed, more versatility, and better cutting performance.
1. Raw production speed.
A CO2 laser moves its beam using lightweight internal mirrors rather than dragging a heavy laser head across a gantry. It can engrave and cut a batch of 20 pet tags in the time it takes a diode to finish three or four.
2. Versatility beyond wood.
If you ever want to transition into making transparent or clear acrylic pet tags, a diode laser physically cannot cut clear or translucent plastics due to its visible blue light wavelength. A CO2 laser handles clear acrylic seamlessly.
3. Better cutting power.
High-power CO2 lasers can cut through thicker wood, and in much less time. This is an area where diode lasers tend to struggle. If you are handling batch work, or looking to expand your products in the future, it is wiser to invest in a CO2 laser engraver, so you don't have to search for a specified laser cutting machine again in the future.

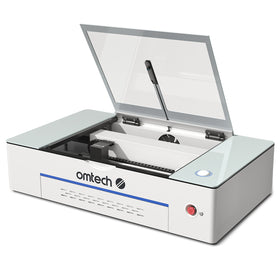
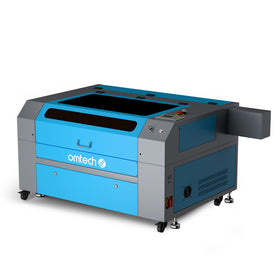
Making Laser-Engraved Wooden Pet ID Tags with the OMTech Pronto 90W CO2 Laser Engraver
Once you've decided a CO2 laser fits your production needs, here's exactly how the process looks on the OMTech Pronto 90W, from material prep through final assembly.
Project Materials You Need
| Item | Notes |
| 3mm (1/8") Baltic Birch plywood sheet (12" x 12") | Primary material |
| Colored acrylic sheets, sandpaper, wood stain/paint, clear acrylic finish | Optional, for added protection or finish |
| Split ring keychains (1 inch) | For attaching the tag to a collar |
Pro tip: Avoid warped or damaged plywood. Always cut on scrap material first, and fine-tune laser power and speed settings for the best edge quality. Always wear laser safety glasses (0.18mm) and closed-toe shoes. Only use approved materials (no PVC/ABS).
Step-by-Step Instructions
Step 1: Prepare your design. Open the SVG file of your pre-made pet ID tag in LightBurn software, or open the provided pet ID tag SVG in a free tool like Inkscape. Identify the layers: "Outline Cut," "Text Engrave," and "Image Engrave."
- Adding text: Use the text tool to add your pet's name and your contact information.
- Changing the shape: Experiment with replacing the tag shape with a bone, heart, or paw print from the software's library.
- Make sure you identify the elements by clearly distinguishing the vector cut lines (tag border) and engrave areas (the pet's portrait and text).
Step 2: For safety, turn on the laser, exhaust system, and air assist (if available).
Step 3: Secure the material and focus the laser. Place plywood on the bed (use magnets), then manually or auto-focus the laser head to the material surface for precision.
Settings:
| Function | Power | Speed |
| Cut (tag border) | 40% | 15 mm/s (adjust based on material) |
| Engrave/Fill (portrait and text) | 50% | 150 mm/s |
Pro tip: Always run a small test on scrap material first to verify power/speed settings match your plywood type.
Step 4: Run the laser job. Use the "Frame" function to confirm position, start only after instructor approval, and monitor the entire engraving/cutting process closely for safety.
Step 5: Post-processing and finishing. Remove the board and debris, and smooth rough edges with sandpaper. For a polished look, apply wood stain to engraved areas and a clear acrylic finish for protection.
Step 6: Assembly. Attach a split ring keychain to the pre-cut hole in the tag. Ensure it's securely closed to prevent loss.

Advantages of Using a 90W CO2 Laser Engraver for Wood Tags
A 90W CO2 laser engraver can be particularly useful for making engraved wooden pet tags because it offers a good combination of engraving speed, cutting power, detail, and production capacity. Here are the main advantages:
1. Faster engraving for batches.
A 90W CO2 laser has considerably more power than a small desktop laser, allowing it to remove material efficiently at higher speeds. Instead of treating each tag as a slow, individual project, you can lay out multiple tags on the workbed and process them together.
2. It can cut the wooden tags as well as engrave them.
This is one of the biggest advantages. If you start with a sheet of suitable plywood, hardwood, or other laser-compatible wood, a 90W CO2 laser can engrave the pet's information and cut the individual tag shapes from the sheet.
For example, you could create a single sheet containing 20 bone-shaped tags, 20 circular tags, and 20 paw-shaped tags. The laser can first engrave the names and contact information and then cut around each tag, meaning you do not necessarily need a separate cutting machine.
3. Better productivity for thicker wood.
A 90W machine provides substantially more cutting capacity than lower-powered desktop lasers. This gives you more flexibility when choosing the thickness of your wooden tag material.
For pet tags, you might want a thicker piece of wood because it gives the tag a more substantial feel and can make it more resistant to everyday handling. The exact maximum thickness depends heavily on the wood species, density, construction, lens, air assist, focus, and machine configuration, so it is better to think of 90W as providing greater cutting headroom, rather than assuming a particular thickness will always cut in one pass.
4. Clean, high-contrast personalization.
CO2 lasers are well suited to engraving many wood products. You can produce highly visible details such as a pet's name, phone number, or a note like "ALLERGIC – PLEASE CALL."
You can also add decorative elements such as paw prints, bones, hearts, logos, or small illustrations. Because the laser removes or darkens the surface of the wood, you can create a tactile, permanent personalization without using ink or vinyl.
5. Precise small details.
A properly focused 90W CO2 laser can reproduce small lettering, outlines, icons, and decorative elements accurately. This is particularly useful when the tag needs to contain both the pet's name and the owner's contact information.
The key is to use an appropriate engraving resolution and a font that remains legible at the tag's actual size — more laser power does not automatically mean greater detail, since the optics, focus, motion system, and settings also matter.
6. More room for multiple tags.
Many 90W CO2 machines have substantially larger working areas than compact desktop engravers. That gives you another important production advantage: batch processing. Instead of engraving one tag, removing it, and loading another, you can arrange many tags across the work area and run them in one job.
For a small business selling personalized pet accessories, this can significantly improve throughput.
7. Air assist helps with wood engraving and cutting.
A suitable CO2 laser setup with air assist can help clear smoke and debris from the cutting and engraving area. This is particularly useful when cutting wooden tags because wood generates smoke and residue during laser processing.
Air assist can help produce cleaner cuts and reduce the likelihood of excessive scorching around the edges; you will still need to choose appropriate settings for the particular wood.
Why 90W Is Particularly Attractive for Pet-Tag Production
The biggest selling point isn't simply that 90W is more powerful. It's that the additional power can make the machine better suited to a production workflow. A capable 90W CO2 machine can perform the engraving and cutting stages in the same setup, while its larger work area can allow multiple tags to be processed together.
So, if you're making a few wooden pet tags as a hobby, a 90W machine may be more capacity than you need. But if you're making personalized pet tags for sale, especially in batches, the combination of speed, cutting capability, workspace, and versatility makes a 90W CO2 laser much more compelling.
Final Thoughts
Laser-engraved wooden pet ID tags are a project where the fundamentals matter more than the machine: a hardwood or quality plywood blank, a well-sealed finish, and legible, well-tested laser settings will produce a durable tag on almost any laser. Where the equipment starts to matter is scale. A diode laser is genuinely the right tool for a hobbyist making a handful of tags for personal pets or a small side project, and there's no need to overspend on capability you won't use.
But the moment you're thinking about pet tags as a product line rather than a one-off project, the calculus changes. The ability to engrave and cut in the same job, process a full sheet of tags in one run, and handle thicker or denser wood without sacrificing detail is what turns a craft project into a scalable small business. A 90W CO2 laser like the OMTech Pronto isn't just faster — it removes the bottlenecks that come with cutting each tag as its own step, which is exactly what you need once orders start coming in faster than a single-tag workflow can keep up with.