Mastering Your OMTech Laser: Nail Focus & Alignment Like a Pro
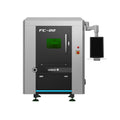
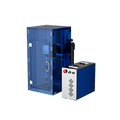
Whether starting a small business out of the garage or making unique projects for a classroom, OMTech Laser machines are designed to make precision personal. OMTech Laser machines provide high-performance engineering that is also user-friendly, making them perfect for creators of any skill level.
In this guide, we will break down the mechanics of laser calibration and alignment - in plain terms. You will learn how to keep your beam dialed right in, how to set the perfect focal length, and how to ensure everything is running as streamlined as your creative brains!
Why Calibration and Alignment Actually Matter
Calibrating a laser engraver is like tuning a guitar. No one plays a guitar without tuning it, so why would you start laser engraving without calibrating and aligning the machine? Failing to do so puts you at risk of producing fuzzy edges, inconsistent cuts, and potentially puts your machine at a greater risk of wear and tear.
Here is what to watch for:
• Calibrating the laser beam - this ensures the laser is striking the exact spot you are targeting, which is the first thing you should do to engrave with detail and accuracy.
• Beam alignment - misalignment of the laser beams will result in uneven cutting surfaces. With a bit of realignment, you will create clean and consistent cuts.
• Focal Length adjustments - the focal point should be adjusted to prevent fuzziness of engraving items, particularly when using detailed designs.
• Z-axis adjustments - if the Z-axis movement is not synced correctly with the laser, the depth of your engraving will vary. A simple adjustment ensures these move in sync again, with no fuss.
If you skip either one of these items, you will affect your entire project. Fortunately, spending a little time on every calibration item can improve your results and lengthen the life of your machine.
Step-by-Step: Do-It-Yourself Calibration for Your OMTech Laser
The great news is that you don’t have to be an engineer to keep your OMTech Laser calibrated correctly. Follow these 5 simple steps:
Step 1: Prepare for Calibration Safely
• First, turn the machine off and unplug the power source. Safety is always a priority.
• Clean all the lenses and mirrors, dust is the killer of laser accuracy.
• Clear and ventilate your space, to be safe in case you do some test engravings.
Step 2: Visit the Focus Distance Adjustment
• First you need to place the laser head at the right height in the Z axis.
• Then you can make any adjustments to the accessories to dial in until the beam hits the surface correctly.
• Once you think you have it correct, try out the settings on a replica or scrap piece to see if your details are sharp. If they don’t look sharp, change the distance/value.
• When calibrating the focal length, be aware of fluctuating power output, since this could signify misalignment.
You can think about this step as adjusting a camera lens. You want to find the sweet spot where all of the body text gets into focus.
Step 3: Adjusting the Laser Beam
• Use the alignment guide in your OMTech manual or look up a video walkthrough online (they're very helpful).
• Put calibration paper or tape at each of the mirrors to see where the laser beam is hitting on each mirror.
• Slowly adjust the mirrors, until the laser beam stays in the center as the beam passes thru the glass system.
• If things still don't look right, don't rush. Sometimes just a small adjustment can make a difference.
Step 4: Z-axis and Horizontal Adjustment
• Check to see that the Z-axis (the part which goes up and down) isn't wobbly or loose.
• Run a few passes and make sure your engraving is uniform in depth across the surface.
• D.I.Y. alignment and tuning can greatly aid in keeping your machine at a competent level, in addition to saving your repair bills down the track.
• Just as you would look after with any CNC tool—including a laser—a tight machine should work very well!
Step 5: Test, Reflect, Adjust
• Do a quick test pass on scrap (leftover wood or acrylic are just fine).
• Take a close look at the engraving. Are the lines sharp? Is depth consistent?
• If something feels "off" go back to focal length or beam alignment for another round of adjustments.
• Repeat the testing and adjust as required until it looks perfect.
It’s a little like baking—you don’t serve the first pancake. Use test runs to get the settings dialed in perfectly.
Keep It Running Smooth: Laser Maintenance Basics
Once your laser is finely tuned, keeping it that way doesn’t take much effort—just a little regular attention:
- Wipe It Down: Clean the mirrors, lens, and work area regularly. A clean machine is a happy machine.
- Inspect Often: Check moving parts, cables, and beam alignment once a week or so.
- Stay Updated: OMTech regularly rolls out firmware updates that can improve calibration and functionality.
- Lube & Tighten: Keep the rails and screws snug and lubricated—especially the Z-axis. It’s like giving your machine a quick tune-up.
These quick tasks help your engraver stay as reliable as the day you unboxed it.
What If Something Goes Wrong? Troubleshooting Made Simple
Even with regular upkeep, the occasional hiccup can happen. Here are a few issues you might run into—and how to fix them:
- Blurry or Wavy Lines?
→ Recheck your focal length. The beam might not be hitting the sweet spot. - Engraving Depth Looks Uneven?
→ Your Z-axis might be out of sync. Go through the vertical calibration steps and retighten anything loose. - Laser Beam Veers Off-Path?
→ Time to revisit the beam alignment. Use your calibration tool and check that mirrors and lenses are still in place.
Think of troubleshooting like adjusting your car mirrors—tiny tweaks can completely change the outcome.
Unlock New Possibilities with OMTech Laser
Once you’ve got the calibration basics down, don’t stop there. Use this newfound control to push your creativity. Try working with different materials—wood, acrylic, leather—and experiment with how settings like focal length affect texture and detail.
Every project is a chance to learn something new. Whether you’re making custom signs, engraving classroom materials, or crafting gifts for your Etsy shop, dialing in your OMTech Laser gives you the confidence to create freely—with clean, professional results every time.
FAQ: Your Top Calibration Questions Answered
Q: How can I calibrate the focal length on my OMTech Laser?
A: Make sure you are off. Move the beam above or below until it focuses well on the surface of your material. Using scrap wood can assist with this calibration until your engraving begins to look clear and focused.
Q: What should I be calibrating you ask?
A: Clean all optics, check beam alignment with the provided calibration tools and guides, verify your Z-axis depth, and do a fast test engraving. Consult your machine owner's manual or check OMTech's video tutorial library for a refresher if needed.
Q: What if my engraving looks uneven or fuzzy?
A: Shut down the machine and check the lens and the mirrors. Realign the laser beam with your calibration guide and re-ensure that it's focused, steady, and tight for Z-axis engraving located at the focal length. Consistent upkeep is the key.
Conclusion
Laser engraving is a mixture of art and science—a lot of creativity is truly endless once your machine is calibrated. You are ready to create with clarity, confidence, and precision when using OMTech Laser and some simple DIY tricks.


