How to Install and Use a Fume Extractor for Laser Engraver
When working with a laser engraver, smoke and fumes are an unavoidable part of the process. These by-products, if not properly managed, can affect the quality of your work, damage your equipment, and most importantly, pose health risks. A fume extractor is an essential accessory that keeps your workspace clean, safe, and pleasant to work in. Whether you’re a hobbyist or running a small business, understanding how to correctly install and use a fume extractor is crucial for both safety and efficiency.
How to Install a Fume Extractor for Laser Engraver
In this guide, we will use the OMTech's Fume Extractor for Laser Engraver as an example. Please note that the installation and operation process may vary slightly for different models, so always refer to the specific user manual for your machine.

1. Attach the extraction hood to the large end of the extraction tube.
2. For LSP-0180, insert the small end of the extraction tube into the air inlet located on the top cover of the main machine.
For LSP-0250, if you want to use only one of the extraction tubes, cover the other air inlet with the wind shield.

3. (Optional) If you want to use the aluminum tube, install the tube adapter:
a. Remove the top cover by opening the cover latch.

b. Remove the screws using an M3 hex screwdriver (not included).

c. Align the holes on the adapter with those on the main machine.
d. Insert the screws into the holes.
e. Fit the nuts onto the screws, tightening them in place..
f. Replace the top cover.

4. Adjust the extraction tube and hood according to your needs.
Note: The longer and curvier the extraction tube, the weaker the suction will be at all levels. For best results, position the source of the fume 10–15 cm (4–6 in.) away from the extraction hood.
5. After ensuring your power supply is compatible and stable, connect the power cord to the main machine and then its power supply. Check that all power connections are stable.
How to Use a Fume Extractor for Laser Engraver
1. Press ON/OFF button to turn on the machine and the indicator above it will turn green.
2. Adjust the suction mode by pressing the FLOW button according to your needs.
Note:
- The suction is low by default upon startup.
- Press FLOW button once to medium suction mode and the indicator above it turns
orange. - Press FLOW button twice to high suction mode and the indicator above it turns red.
3. Press ON/OFF button to turn off the machine.

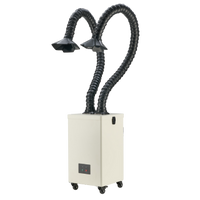
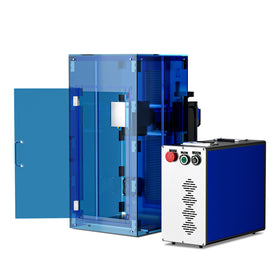
Recommended Product: OMTech 150W Fume Extractor for Laser Engraver
For anyone looking to keep their workspace clean and safe, the OMTech 150W Fume Extractor is a reliable choice:
-
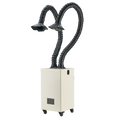
Industrial Fume Extractor: Powerful 150W DC motor generates 250 m³/h airflow, compatible with OMTech laser cutting and engraving machines.
-
3-Stage Filter: Activated Carbon outer filter, internal filter, and cotton primary filter work together to remove harmful gases and unpleasant odors.
-
Highly Mobile: Four quality casters allow easy movement between devices, with a hermetically sealed extraction tube that folds and fixes at the desired angle.
-
Intuitive Control: Adjust airflow easily with three modes to match your specific needs.

Conclusion
Using a fume extractor isn’t just about protecting your workspace—it’s about safeguarding your health and ensuring your laser engraver delivers the best results every time. Proper installation and usage make a significant difference, helping you maintain a clean, safe, and productive environment. Prioritising air quality is a small step that pays off enormously in the long run.


