Paint Fill Wonders: Post-Process Adventures in Laser Art with OMTech
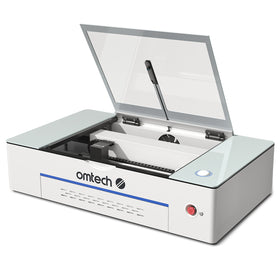
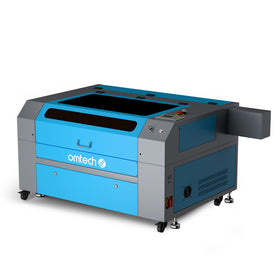
OMTech Laser combines traditional artistry and modern-colored tools to help realize your creative vision with accuracy and ease. Whether you are laser etching wood or metal, the real magic happens once post-processing begins, where your project goes from "close enough" to show worthy. Think of it as the final touches on your freshly cut gem. With the right techniques—cleaning up residue, smoothing surfaces, and adding vibrant paint fills—you’ll give your engraved pieces the finish they deserve.
Mastering the Basics: Simplifying Laser Engraving Techniques
Before you can worry about the finishing touches all of it starts with getting the engraving itself correct. OMTech's laser machines make this achievable, but some experience does not hurt.
You must start with a strong design pattern--good vector lines and a well-tailored setting help even if you are engraving on a plank of maple, or a stainless-steel tag; the process usually follows some common rhythm.
• Design: Use any design software you prefer to create artwork.
• Parameters: Set the laser's power, speed, and depth for the material you are using.
• Material: Anchor your work piece securely to avoid any misfires.
Once you’ve got this foundation, you’re well on your way to creating engraved pieces that already look good—and will look even better after post-processing.
Why Post-Processing is Where the Real Value Happens
Engraving is definitely the main attraction, but post-processing is your secret sauce. Here's why you need to consider this step to be more important than you think:
• Cleaning Up Wood and Metal: When laser engraving, you can leave behind a cocktail of dust, scorching and debris, and a good clean up does two things here, looking at surface aesthetics and ensuring that paint or sealants will all work correctly.
• Polishing the Surface: A good buff or polish is going to help the contrast pop off the engraved areas and ultimately provide a smooth surface when handled.
• Getting Ready to Paint Fill: If you are putting down any gel color for a paint fill, it is vital to get rid of any residue. When paint starts to flow down across the surface area it will leave a clean edge for sharp lines to come through.
In other words, post-processing does not just enrich your design, it protects, improves, and professionally-finished it.
From Raw to Radiant: The Beginner's Guide to Cleaning and Polishing Your Laser Engravings
If you are a beginner or an expert with one or two projects under your belt, don't worry! Following these steps, you will achieve a clean, polished result every time!
Step 1: Choose and Prepare Your Material
• Choose quality wood or metal—materials with consistent grain or finish tend to engrave more cleanly.
• Before you start engraving, make sure you wipe off any dust or dirt to start off the project neat and tidy.
Step 2: Engrave Your Design
• Upload your design to OMTech's laser software.
• Set your laser parameters accordingly to your material. Please don't rush through this step.
• Be sure to monitor in case you miss a snag in the engraving process.
Step 3: Quick Cleanup
• Allow the engraved piece to completely cool down.
• Use a soft brush or blast of compressed air to sweep away any excess debris.
• Lightly cleaning the piece will make the final cleaning much easier.
Step 4: Polish It Up
- For wood: Gently clean with a damp cloth and mild soap if needed.
- For metal: Use a suitable polish or cleaner—just be sure it’s safe for the surface.
- Use non-abrasive pads to avoid scratching while removing any remaining residue.
- Let it dry completely before moving on.
Step 5: Add the Finishing Touches
- Apply a stain, sealant, or even a clear coat to protect the engraving and add depth.
- Thinking of adding color? A paint fill can really make designs pop—just be sure the surface is squeaky clean first.
Follow this workflow and your finished piece won’t just look good—it’ll feel like a piece of craftsmanship.
Additional Tips for Perfect Results Every Time
A polished engraved surface not only looks better, but also will last longer. Here are some tried and tested tips to make your project stand out:
• Test First: Test your post-processing steps on a scrap piece. It’s an easy way to not have surprises on your actual project.
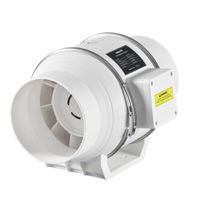
• Be Considerate: Make sure to use good ventilation when engraving and always wear proper protection when engraving, especially when using a chemical cleaner or polish.
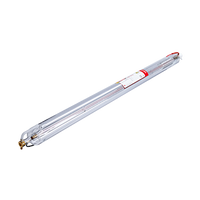
• Take Care of your Machine: A properly maintained laser engraver is your best tool. Make sure you clean the lens regularly, check the alignment and follow OMTech’s maintenance schedule for your machine.
• Play with your Post-Processing: Test out a new polish, a bit of color, or layering techniques. You may discover a finish that becomes your trademark.
With a bit of practice, you will notice the difference these small actions will make in your final results.
Frequently Asked Questions
Q: How do I know if I have cleaned the engraved surface adequately?
A: For a fast test, run your fingers over it—if it feels smooth and you don't feel any residue, you should be okay. Bright light can help you see areas that may need more cleaning.
Q: Are the same post-processing steps okay for wood and metal?
A: Generally, yes. The process remains the same, products will differ. Wood can be cleaned with soft cloths and mild soap, while metal maybe require a specific polish. First test it on the corner before using on the whole liner.
Q: What should I do to keep my OMTech Laser in good working order?
A: Maintenance is important. Keep your lenses clean, calibrate, and ensure your exhaust is working well. Change worn out parts as required - it will keep your engravings sharp and consistent.


