Wood and Metal Showdown: Vector Sharpness vs Raster Clarity
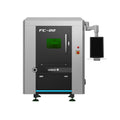
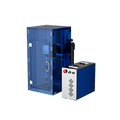
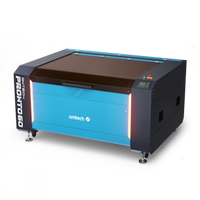
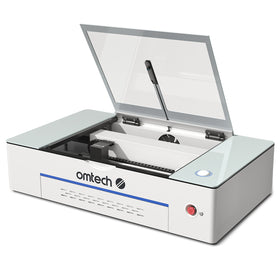
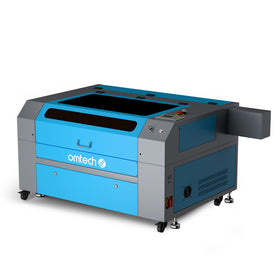
OMTech Laser machines are known for their accuracy, ease of use, and ability to engrave in wood and metal. Whether you're creating custom wood gifts or laser-engraved metal signs, OMTech Laser makes control of your designs intuitive. With a simple-to-use interface, the machine allows you to adjust the vector engraving and raster engraving, accommodating just about every creative need. From laser engraving settings and parameters to how you set vector engraving on wood or metal, OMTech Laser ensures that your engraving projects, whether on wood or metal, are done with elegance and excellence.
Vector vs. Raster Engraving Settings: What’s the Difference?
As you prepare for your next engraving project, you may be thinking: vector vs. raster for wood? The answer will be based on what you want your design to look like: Here are a quick breakdown:
• Vector Engraving
– Paths and Lines
– Sharp, clean engraved lines and perfect for logos, meticulous designs, and labels etc
– Vector engraving fast or slow depends on how deep or detail you want the engraving. If you would like vector engraving deeper into metal or acrylic, you should go slower for more precision.
• Raster Engraving
– Generally, refers to crowning semi-laser technology, images are engraved like a printer scans an image line by line, and this method is a great approach for photos and images. There are specific images that allow engravings of clear photos with proper resolution to produce excellent results.
– The best raster settings will provide the best detail on fabric, glass, or even wood. At best, the details of a raster engraving will be crisp, however, often, you will need to adjust the raster DPI to avoid a raster engraving blurry fix.
These differences represent that both vector and raster engraving settings are of specific benefit to make images. Upon deciding to use vector or raster, it is best to consider what the design of your artwork looks like. If you have a picture with sharp lines, vector settings for metal or detailed, clean designs would be best suitable. However, for rich images filled with details where you might have considered yourself producing a raster engraving, the raster engraving and adjusting raster DPI settings - would produce clear images.
Laser Engraving Settings for Wood and Metal: Getting Started
Getting crisp and accurate engravings begins with understanding your machine’s controls, and here are some key factors to consider:
• Laser Engraving Settings And Parameters: The laser power, speed, and frequency are the most important; you need to balance these settings to burn the wood and not burn the surface while keeping the image deep and detailed.
• Vector vs. Raster Engraving Settings: You should know the properties you are trying to achieve—vector engraving produces lines sharp enough for crisp designs, and raster engraving usually for photos, needs the correct resolution and power settings.
• How To Set Vector Engraving on Wood or Metal: This usually involves uploading a vector file into your OMTech Laser software and adjusting your vector settings, such as selecting metal or acrylic tips for settings that would produce even finer results.
By recognizing and setting these parameters, you can easily adjust your raster to vector settings, even play around to see which is best—vector vs. raster speed— for your specific project.
A Guide to Engraving Wood with OMTech Laser
This guide is designed to help you get familiar with your OMTech laser machine for wood engraving.
Step 1: Choosing Your Materials
• Choose a piece of wood that is solid and free of cracks or high moisture content.
• Also consider the species of wood, as each species acts differently with laser power settings.
Step 2: Your Artwork
• Design your artwork using a vector program if you want sharp vector engraving lines, or prepare a high-quality image if you plan on raster engraving.
• Once you've created your artwork, save the file in a format that runs cleanly with OMTech's vector laser.
Step 3: Set and Prepare Machine
• Mount your chosen wood on the engraving bed in a secure manner.
• Assign laser engraving settings and parameters: If you are assigning vector tuning, then consider if you will need faster or slower passes; for the raster assignment, set the best raster settings and arrange the raster DPI for clarity.
• Use preset profiles if you can, which will allow you to spend less time with your engravings.
Step 4: Begin Engraving
• If you are testing your vector vs. raster engraving settings, then take this step as a test run before assigning your artwork.
• If you have vector settings, just make sure that the lines come out sharp; for raster, just boost to make sure there are clear images without any blurred fixes.
Step 5: Finishing Touches
• Once engraving is complete, inspect the design. For wood, you might finish with a clear sealant to enhance natural beauty.
• Clean the material, remove any residue, and evaluate if further adjustments are needed in laser engraving power setting or vector engraving acrylic tips for future tests.
How OMTech Laser Combines Creativity and Technology
With OMTech Laser, even novices can try their hand at different methods of engraving. The intuitive software provided makes it easy to adjust the settings in the vector laser setup and change the raster to vector settings, thus giving you much more creativity. Here are a few suggestions to expand your crafting:
• Use vector to create more intricate designs on metal to achieve deep engraved effects.
• Play with different raster settings when engraving with fabric or glass, remember to adjust raster DPI settings to keep a sharp photo.
• Compare results: which is better, vector or raster? How does engraving with vector fast or slow affect the outcome?
Each project is an opportunity to learn, as you gain confidence and improve your laser engraving settings and techniques you will create work that showcases the old-world beauty of wood and the modern beauty of metal.
Frequently Asked Questions
Q: Which is better for wood engraving, vector or raster?
A: It depends on your design goals. For crisp, defined lines and logos, vector engraving works best. For images or photos, using raster settings often gives you clear images with smooth gradients.
Q: How do I adjust raster DPI to fix blurry results?
A: Increasing the DPI can help improve detail in the image. Experiment with small increments until the engraved image appears sharp. Also, ensure that the laser engraving power setting is properly optimized for the material.
Q: Can I switch between vector and raster settings easily on my OMTech Laser machine?
A: Yes, the software is designed to be user-friendly. You can change raster to vector settings within the interface depending on your project needs. There are preset profiles available for popular materials, so you can achieve vector engraving deep into metal or subtle details on wood with ease.


