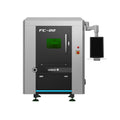
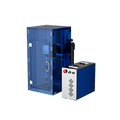
Can OMTech Laser Master Raster Engraving on Wood?
Raster engraving is one of the many laser engraving techniques used today, allowing artists to achieve photo-quality images by switching on and off the laser across the material in a left-to-right motion on one line or row at a time - much like the way a printer would work. If you’ve ever wondered what is raster engraving or how to raster engrave, OMTech Laser machines are intuitive and user-friendly, which allows easily convert photos for laser engraving into an Art Piece! The beauty is the settings are easily adjustable for their optimal settings, truly allowing you to experiment the best images for raster engraving and produce photo quality results.
In this article, we will look at some practical tips for raster engraving on wood, tips for improving raster engraving, understanding the general difference(s) between raster versus vector engraving, and finally hands-on advice for cleaning raster engraved pieces - all using an OMTech Laser system.
Understanding Raster Engraving and Its Settings
Before you get started, it is important to know a little more about raster engraving. Raster engraving subdivides your image into a series of dots or lines that the laser engraver follows. The art quality is greatly based on the raster engraving settings. Important points to consider on raster engraving are:
• Laser Engraving Methods: OMTech Laser machines allow you to adjust many different variables such as power, speed for raster engraving, and depth so engraving is not too shallow and not too deep.
• Raster engraving setting: play with different speeds and power levels. For example, you may be able to achieve a smoother finish for deeper engraving on wood by increasing the engraver's speed. You might have to adjust the depth of the engraver depending on the type of wood being used.
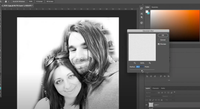
• Preparation of images for Laser engraving: Preparing your images for laser engraving involves converting photo for laser engraving. Make sure you are using a raster engraving software program. Raster engraving software allow you to make adjustments to contrast and sharpness of your image, ensuring the final product has clarity and detail.
Raster Engraving Works: The Process Using OMTech Laser
Using an OMTech Laser to raster engrave is easy and enjoyable. If you're raster engraving wood or metal or another material, let's go through a quick set of steps before you start:
Step 1: Choose the Material
Choose a quality piece of wood or material of your choice. If you've chosen wood, make sure to consider the grain and thickness of the finished product. Clean the material to ensure that dust and oils are removed since they can affect the engraving process.
Step 2: Prepare your Image
Use a raster engraving software that you trust to prepare your image. This can be a photograph or a graphic you created. Make adjustments such as contrast and resolution so that the best images ready for raster engraving will have continuity. Once you've made your adjustments, save it and load the image file to the OMTech Laser machine interface.
Step 3: Set up the Machine
Position your material properly on the engraving bed. Enter the raster engraving settings including power, speed for raster engraving, and how deep does raster engrave. OMTech Laser machines typically offer preset profiles for almost all kinds of materials making it easier for you to get the result you're looking for!
Step 4: Start the Engraving Process
Initiate the engraving process and watch as your design is brought to life with precision strokes. Monitor the progress on the machine’s display screen. For those wondering how to improve raster engraving, taking note of the initial results helps you fine-tune the settings for future projects.
Step 5: Post-Engraving Care
Once the process is complete, carefully remove your piece and allow it to settle. For wood projects, follow up with cleaning raster engraved pieces to remove any minute wood dust and residue. This step ensures that your final work not only looks beautiful but is also well-maintained.
Practical advice for enhancing your raster engraving projects
If you want to improve your engraving techniques, these helpful hints may improve your raster engraving results:
• How to Raster Engrave: Always test on something. Perform a small test run with scrap material to adjust all settings from raster engraving settings to speed for raster engraving.
• Raster Engraving Tips: Make sure the contrast of the image is high before you engrave. This will allow the overall clarity and detail of the engraving to stand out better.
• Conversion and software: High-quality raster engraving software will let you convert photo for laser engraving without any hassles.
• Texture and detail: You can also experiment with the different power and speed levels which will help with understanding the difference between raster engraving and vector engraving. Vector engraving will makes clean lines when raster engraving will allow for detailed shading and texture.
• Can you raster engrave metal? Wood is usually the most common, but you can find some OMTech Laser models that will raster engrave metal. By adjusting the settings slowly, you will learn how to mark the metal surface without losing quality.
Cleaning and Caring for Your Raster Engraved Items
Care is similar to the engraving function itself. Taking care of the workspace and final products will help maintain the fine detail as well as the vivid colors of your engravings. Here are some ways to implement care on raster engraved objects:
• Using a brush, gently brush off any loose particles or wood dust from the surface.
• After removing loose particles, now take a clean soft cloth and wipe down the piece. Use the cloth dry, or slightly damp with water for any stubborn areas, just be careful with water depending on the wood.
• For metal pieces, the best option is to use a gentle cleaning solution as advised by the manufacturer. The last thing you want is to damage the piece chemically and have to engrave again.
• Remember to regularly clean the lens and mirrors of your OMTech Laser machine regularly to keep it operating at optimal levels. Each of these cleanings can be thought of as care of the machine as well as care of the project just completed. Since there is a risk of residue from your last engraving project remaining on the machine, cleanliness during your engraving projects will help to avoid this issue for future projects.
Combining Creativity with Precision
OMTech Laser machines empower you to blend artistic creativity with mechanical precision. Whether your passion lies in creating intricate patterns or bold designs, these machines provide a versatile platform for innovative artwork. With hands-on control over laser engraving techniques—including how to improve raster engraving and optimal raster engraving wood tips—you can always push the boundaries of what’s possible on your chosen materials.
By constantly experimenting with different materials, settings, and designs, users will quickly find that mastering raster engraving is both accessible and highly rewarding. OMTech Laser stands out as the ideal tool for anyone eager to dive into laser engraving, making laser project a journey of creative discovery and precision engineering.
Frequently Asked Questions
Q: What exactly is raster engraving and how does it differ from vector engraving?
A: The raster engraving works like your design is etched in small dots or lines like a printed image. However, the vector engraving will engrave along the precise lines created by the computer graphics. The use of the OMTech Laser system allows you to "hop" from one technique to the other with no hassle at all. You will be supplied with the best settings to achieve clear and detailed results.
Q: Can I raster engrave on metal with an OMTech Laser machine?
A: You can, but you might find that it is more common to use wood for raster engraving. You will have to be mindful for the settings like power and speed when using metal. Always ensure to check the machine manual and you may want to run a test part made from a small piece of metal to adjust for the best engraving depth and quality which doesn't damage the material.
Q: How do I turn a photo into a good raster engraving design?
A: I would suggest, for a raster engraving design to start with a dedicated raster engraving software program to lower the brightness, decrease the contrast and lower the resolution of the photo. This step will showcase the details, making it easier for a laser processing to capture the differences during engraving. Besides, OMTech Laser machines typically receive formats that go well with these conversions, and your design will retain all the sharpness and detail.


