5D Laser Engraving Techniques and Tips
Laser engraving has come a long way from simply marking a surface. OMTech Laser machines represent a paradigm shift, allowing you to embrace 5D engraving. With simplified settings, accurate control and incredibly powerful customization, OMTech laser machines allow you to turn a flat image into a complex 3D artwork that seems to pop right off the cut surface! Whether you are curious about what is 3D engraving or can’t wait to learn techniques for 3D engraving, the combination of 5D and 3D techniques creates a new paradigm for your creativity and imaginative expression.
Illustration of 3D Engraving and How It differs from conventional engraving
3D engraving is much more than placing a design on a surface. It’s engraving into a material to create an illusion of depth, and dimensional appearance. Wondering how do you 3D engrave? By modifying your laser power, speed and focus, you can achieve various depths within that material to create an experience not only visually appealing but also tactile to the users.
Questions usually being asked are "Can laser engrave in 3D?" "What is 3D engraving?" Yes, 3D engraving involves multi-pass for the laser, leverage programming for back and forth that builds layers. Therefore, with proper settings for 3D laser engraving on a laser machine, you have the capability to create amazing 3D effects with laser while expressing shadows, textures and gradients that will bring your art to life.
5D Engraving—Going Beyond Dimension and Depth
5D engraving gets even more in depth! While 3D engraving is focused on depth and dimension, 5D techniques create multi-layered effects that enhance shapes, lines, and even the background. Think of it as the combining of traditional depth we talked about in 3D engraving and then additional detailing that makes your pieces almost sculptural in quality! It really is the ultimate method for clients looking for a little more drama and detail for custom signage, decorative art, or personalized gifts.
To achieve such effects, 3D engraving techniques are employed. By layering cuts and using OMTech laser machine’s advanced settings, you can get 3D effects with a laser that include soft gradients and deep textures. The key is to have fun experimenting with settings and different passes; it can be both an art and a science.
The Basic Steps To 3D Engraving with OMTech Laser - 5 Steps
If you are wondering how to get started with 3D engraving, this is the basic guide for using an OMTech laser machine and get started with 3D engraving. Here are the steps:
Step 1: Choose and Prep Your Material
You are going to want to choose a quality material like wood or acrylic. Make sure the piece is flat and clean and secure the piece to the engraving bed properly so that it will not move during the engraving. Different materials may require fine adjustments to the power and speed settings.
Step 2: Create Your Artwork
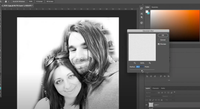
Create the design using vector graphics or raster graphics software. Primarily for 3D engraving you will want to consider outlines and gradients to simulate depth. Save the file in a file type that is supported by the OMTech laser machine, and always check to make sure that your artwork had the 2 layers (for 3D or 5D effects).
Step 3: Set Your Laser Settings
Set the power and speed and focus settings for your laser. If you are trying to engrave with depth you may want to perform several passes of different intensities. OMTech Laser Machines will generally have pre-programmed profiles to help you simplify the process and you will be able to fine tune your settings for making 3D effects with lasers.
Step 4: Start the Engraving Process
Launch the engraving operation and keep an eye on the machine’s progress. The laser will begin by outlining your design and gradually creating layers to achieve the desired texture and depth. Patience here is essential—rushing the process might result in uneven cuts.
Step 5: Finishing and Post-Engraving Touches
After the machine has completed its work, carefully remove your piece. Clean off any residue and evaluate the quality of depth and texture you’ve achieved. If needed, apply a finishing coat to enhance gradients and accentuate the dimensions of your design.
Techniques for Depth, Texture, and Gradient
The secret to stunning 3D laser engraving is in the detail. To help you master the art of creating depth with laser engraving, here are some great ideas:
• Gradient with Laser Engraving: Instead of one pass, use multiple lighter passes that gently fade away to mimic the effect of light and shadow.
• Texture with Laser: Different speeds and laser strengths will give you different textures on your engraving material, from smooth to rough and tactile.
• Depth with Laser Engraving: Change the focus of the beam, so that some parts of the design are engraved deeper than others, thus creating the feel of real depth or 3D.
Techniques like these illustrate that you're not just playing with lines, you're sculpting the material, shaping the material and achieving amazing pieces of art.
Tuning Your OMTech Laser for 3D and 5D Engraving
Understanding the best settings for 3D laser engraving can change the way you create. With OMTech’s interface, you get to make real-time adjustments to help control depth and texture if you need it. Take some time to play with varying settings on scrap pieces of the material you will be ultimately using. You will know the effect of the various laser passes, and can adapt those laser technique settings to ensure your depth of effect when ready.
Each material (i.e., hardwood, softwood, plastic) behaves differently when laser carving. This is where a dependable machine, such as OMTech provides you with variety and control with the option of changing profiles. This will allow your creative projects to gain the depth of vibrant 5D engraving that really catches the eye.
Widening the Scope of Your Creative Expression
As you become more familiar with advanced laser engraving practices, you may want to combine 3D and 5D effects to create interactive multi-dimensional works of art. From creating stunning pieces of home décor, personalized gifts, and custom signage, the creative expression possibilities are endless. The OMTech Laser machines provide total freedom to expand your creativity; mistakes become lessons and every project is one step closer to precision in creativity.
Frequently Asked Questions
Q: How difficult is it to learn how to create 3D engraving with an OMTech Laser machine?
A: OMTech Laser has made learning how to do 3D engraving easy. The machine is designed with preset profiles that are easy to follow and are user friendly, so even beginners can make layered textured artwork in no time.
Q: What is 3D engraving and can I really achieve depth with laser?
A: 3D engraving is essentially etching into material to give an illusion of depth achieved by varying laser power and executing multiple passes. Yes, you can achieve an impressive depth with laser engraving, especially the more you play with the settings and engraving technique on your machine.
Q: Are there preferred setting recommendations when creating gradients using 3D engraving?
A: The OMTech Laser allows you to control the power, speed, and focus which is so important when achieving gradients. Typically, using multiple lighter passes and adjusting the focus between layers helps create smooth, gradual transitions that mimic natural light and shadow. To achieve your desired gradient effect, please practice your settings on scrap material in advance.


