Laser Engraving Christmas Signs: DIY Tutorial & Sign Ideas

Custom wood Christmas signs are among the most popular seasonal décor items and among the most profitable for makers and small business owners. They offer warmth, personality, and the nostalgic charm of handcrafted décor. Unlike store-bought decorations, personalized signs display family names, holiday phrases, dates, and unique artwork, making them meaningful keepsakes that get pulled out year after year.
Laser engravers make the process easier and more precise than ever. You can engrave or cut intricate lettering, design accents, and even silhouettes of ornaments, trees, or snowflakes with a laser cutter. This guide will walk you through the process of making custom wood Christmas signs—from choosing the right wood to engraving and finishing.
1. Choose the Right Wood
The quality of your wood affects the crispness of your engraving and the smoothness of your final finish. Softwoods like pine or poplar engrave well, but birch plywood is often preferred because it's smooth, stable, and less prone to warping.
Recommended wood types:
-
Birch plywood (⅛″–½″ thickness)
-
Solid hardwood boards (poplar, pine, maple)
-
Pre-cut craft boards from hobby stores
What to look for:
-
Smooth surface with minimal knots
-
Flat boards (no warping or twisting)
-
Even grain that won’t interfere with text or small details
2. Design Your Sign

Your sign design can include:
-
Holiday phrases
-
Family names or monograms
-
Seasonal graphics (snowflakes, reindeer, pine trees)
Software options:
-
LightBurn (most common with laser engraving)
-
Illustrator/CorelDRAW (export as SVG or DXF)
-
Canva (design → export → convert to SVG for engraving)
Design tips:
-
Leave ~½″ margin for visual framing.
-
Use bold or script fonts for that farmhouse holiday look.
-
Combine text + icons for balance.
3. Secure the Board in the Laser Cutter
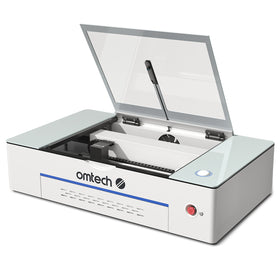
Inside your laser engraver, position the wood on the honeycomb bed and secure it using magnets, pins, or tape. Ensure the board is lying flat and the laser focus is correctly set to the surface height.
4. Set Laser Power and Speed
Start with these cutting settings (adjust as needed):
|
Laser Watt |
Cutting Power |
Speed |
|
60W CO₂ |
30-90% |
50 mm/s |
|
80W CO₂ |
30–90% |
55 mm/s |
|
100W CO₂ |
30–90% |
60 mm/s |
Don’t forget to enable air assist to reduce charring and improve engraving contrast.
5. Mask the Wood (Optional)
Masking helps prevent smoke marks and is especially useful if you plan to paint the engraved areas.
Use:
-
Painter’s tape
-
Laser mask sheets
The laser cuts cleanly through the masking, and once removed, your cutting edges are crisp.
6. Start the Cutting
Run the cutting job and stay nearby to monitor:
-
Positioning
-
Depth
-
Smoke extraction
Let the board cool before handling.
7. Sand and Prep the Wood Surface
Before you paint, the wood needs sanding for a clean, professional finish.
Steps for sanding:
-
Start with 120-grit sandpaper to remove roughness and mill marks.
-
Finish with 220-grit for a smooth engraving-ready surface.
-
Wipe with a tack cloth or microfiber cloth to remove dust.
8. Apply the Paint/Finish

Paint gives a pop of color to your signs that contrasts with the natural wood. Finishing will also enhance that contrast while protecting the wood. Spray paint is a quick and easy way to customize your work.
Finishing options:
-
Clear polyurethane or lacquer
-
Oil finish (Tung oil or Danish oil)
-
Chalk paint (for farmhouse style)
9. Add Hanging Hardware
Options include:
-
Sawtooth hangers
-
D-rings
-
Twine threaded through drilled holes
For tabletop displays, attach small stands or braces on the back.
Wooden Christmas Sign Ideas (Design Inspiration)
Here are some popular engraving themes that look beautiful on laser-engraved wood:
Text/Phrase Ideas
-
"Merry Christmas" (classic farmhouse script)
-
"Believe" (with stars or Santa’s sleigh)
-
"Let It Snow" (paired with snowflakes)
-
"Joy to the World" (ornament frame design)
-
"Sleigh Rides · Hot Cocoa · Warm Blankets" (vertical porch sign)
Family & Personalized Designs
-
"The Anderson Family — Christmas at the Cabin"
-
"Home for the Holidays — Est. 2024"
-
"Santa Stop Here — Olivia & Mason"
Shape-Based or Cutout Sign Ideas
-
Round wood signs with layered lettering
-
Engraved ornament-shaped mini-sign sets
-
House silhouette signs with outline engraving
These designs are highly giftable and sell extremely well at holiday markets because personalization adds emotional value.
Conclusion

Making custom wood Christmas signs with a laser engraver is a rewarding project for both hobby creators and business owners. From carefully selecting the wood, to sanding, engraving, and finishing, every step contributes to a handcrafted piece that feels special and personal. Whether you’re gifting them to loved ones or selling them at holiday markets, these signs become timeless décor that families enjoy year after year.
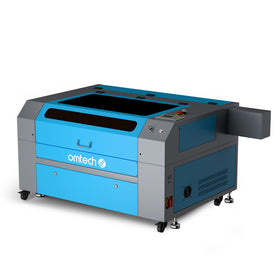
Make personalized Christmas gifts that last a lifetime. OMTech laser engravers give you the precision, speed, and creative flexibility you need to produce professional-grade wood signs and holiday décor. Explore OMTech laser machines and let your creativity shine—one sign at a time.


