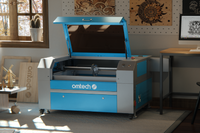
Laser E-Stop Mastery: Smart Setup, Testing & Safety Tips
Whether you are a hobbyist, teacher, or small business owner, having a laser engraver is not an option or luxury, it is an absolute necessity for your safety. OMTech Laser systems are built with precision and power, but even the best machines need a fail-safe. That’s where the emergency stop button comes in. This is where the emergency stop button comes in. Consider it your "panic button". If ever something goes wrong - a jammed piece of material, an overheated component, or simply a lapse of concentration - this little red button will kill all power to the machine almost instantly! It is not only helpful, but it can prevent accidents and keep your equipment (and fingers) safe. And, yes, having one is not just smart, but mandatory in some areas.
Laser Safety Equipment: More than Goggles
Laser machines are not toys. They are machines that cut, burn and etch with intense light. Safety goggles and ventilation are just the beginning. You are going to need an emergency stop button. The emergency stop button is "insurance" that you hope you never need but, it's not something you want to not have.
Simply put, if something mechanical fails or, if someone human makes a mistake, the sooner you can stop everything the better. Alternatively, the emergency stop is a part of being a conscientious operator, and more specifically, it is on the list of things that help keep you from damaging your equipment.
Installing an E-Stop Button: A Quick How-To
Worried that installing an emergency stop button is over your head? Don’t be. With a bit of patience and the right instructions, it’s a straightforward job. Here’s the breakdown:
- Pick a quality button that meets safety standards—don’t go for cheap parts here.
- Study the manual for both your engraver and the button to understand wiring compatibility.
- Cut the power to your laser before doing anything. Safety first, always.
- Mount the button somewhere solid using screws or snap-in brackets.
- Wire it in according to the manufacturer’s instructions. You’ll usually connect it to the machine’s main control circuit.
- Test it out. Push the button while the laser is running. It should shut down immediately.
If you’ve ever typed “how to install emergency stop button” into a search bar, this is your answer in plain English.
Best Places to Put an E-Stop Button
Where you place the emergency stop matters just as much as having one. Picture this: something goes wrong, and your hand can’t reach the button fast enough. That’s a problem.
Here are some placement tips that make sense:
- Mount it near the main control panel so it’s right where you’re working.
- Keep it at arm’s reach, not buried behind clutter or hidden under the table.
- If multiple people use the machine, consider installing more than one e-stop—one on each side can be a game-changer.
- Make sure the area around it stays clear. A blocked emergency button is a useless one.
So when you’re asking yourself, “Where should the emergency stop go on my laser engraver?”—think fast access, high visibility, no obstructions.
When (and How) to Test Your Emergency Stop Button
Installing the button is just step one. Testing it regularly will ensure it works when you need it to.
Here is a simple test routine:
• Run the machine to follow its normal startup routine.
• Press the e-stop during operation. Machine should shut off immediately.
• Pay attention to the machine. Are there any odd clicks, hums, buzzing, or silence that are out of place? Check your wiring.
• Reset the button per your manual. Most models are just twisted to reset.
• Repeat the test regularly; if you are using the machine every day, you should test the button at least once a week, if you are only using the machine occasionally, test it at least once a month.
Routine inspection legitimates the common “does my laser need an emergency stop?” question by saying “absolutely practical yes”.
Maintaining your E-Stop Functionality
Like any component of your equipment, your e-stop button will need some maintenance to ensure it is reliable. The good news? It is pretty low maintenance.
• Complete a visual check occasionally. Look for wear, cracks in the shell, or discoloration
• Clean the e-stop. Dust and debris can make it nonfunctional.
• Reset the e-stop correctly after each test
• Record an inspection - especially if your in a shop/classroom where a safety audit may occur.
• Repair wiring errors immediately. If you have doubts about the e-stop, don't delay in correcting replacement.
A non-functional e-stop is similar to having no e-stop at all. Cleaning your e-stop, and making sure of its operation safety gives peace of mind to you - knowing your laser engraver is available to operate safely.
Troubleshooting and Upgrades: What to Do When Issues Arise
No matter how well you maintain your button, at some point in time you will run into problems, whether it is because of a button that is not responding, loose wires, or old machines that just don’t seem to work with anything. Sometimes it just happens.
So, here are some tips for troubleshooting:
• Check your wiring again. It’s usually a loose connection.
• Check your power supply. Make sure the voltage is correct and that there are no damaged connectors. If there is broken power supply, that could disable the button.
• Consult your machine’s manual or go to OMTech’s support center to look at troubleshooting options.
• Ask the community. There are people who have been in your situation on every online forum.
• Upgrade if necessary. If your button is old and probably outdated and potentially not reliable, then might as well change out an unreliable button for a newer, more reliable version.
If you’re even thinking to yourself, “Can I add a stop button to my old laser machine?” — absolutely yes. And you should!
Understand the Regulations: Rules of Emergency Stop
The regulations governing emergency stops exist not to annoy you, but to help protect you and your equipment. The standards usually state where buttons should be installed, what they must do when activated, and what the frequency is for testing or maintaining them.
OMTech machines are mostly simple in compliance, but you should still check to make sure. Safety regulations are designed to protect you, as well, and shield you from being liable if something goes wrong.
Common Questions—Answered
Q: How can I be sure the emergency stop button will be compatible with my engraver?
A: Start with your user manual. Most OMTech users use a standard e-stop buttons, but if you are unsure, reach out to their tech team. It is better to be safe than sorry.
Q: How often should I test or maintain the button?
A: Most people test every month and maintain every three months. If you do a lot of daily work on your machine, it is advised to test more often.
Q: What happens if during the test, the button does not work?
A: Shut the machine down right away. Check all wires and reset connections. If you are still stuck, get support or a licensed technician to fix the problem before you use the machine again.


