Master Laser Bed Sparkle: Mirror Shine and Dust Ditching
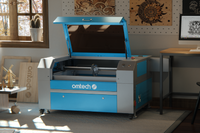
OMTech Laser machines are loved because they are incredibly accurate, user-friendly, and versatile for a variety of projects, particularly wood projects. Even the best instrument needs some care from time to time. Proper maintenance of your laser engraver matters, no matter if you are just starting or have been engraving for a long time. It can make a difference in the quality of your outputs and the lifespan of your engraver.
This guide is designed to help you get the most from your OMTech setup. We will review some useful cleaning methods and outline some basic maintenance actions you can take to keep your engraver running smoothly. From cleaning the lenses to cleaning dust from the bed, these habits will help you in your projects.
Your Laser’s Health Checklist: Cleaning & Maintenance Made Easy
Researching information about a habit of maintenance on a routine basis is not only to prevent the unforeseen; it is to optimize the quality of each cut and ensuring each engraving is crisp. Here are the basics that every laser user should embrace:
• Clean your lens and mirrors - Just a quick wipe is all that is needed. Using your favorite lens cleaner with any non-abrasive soft cloth will remove any dust or buildup. A "dirty" lens will scatter the beam of laser light, resulting in fuzzy or inconsistent cuts.
• Remove Dust - Dust will find each and every way to collect in and around a laser. A small vacuum, or some compressed air, is a good way to remove as much of the loose debris as possible. Don't forget those difficult corners or areas under the work bed.
• Clean the work space - The work area should be considered your creative area. Less clutter in a workspace will have less to distract you or spill on your work. Additionally, keeping the area around your engraver clean will clear away unwanted items resting on sensitive parts.
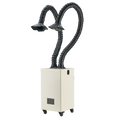
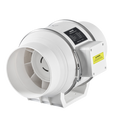
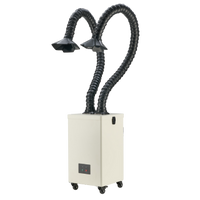
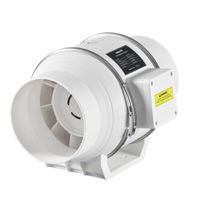
• Don't Ignore the Exhaust System - his important component is often forgotten but is the first barrier to smoke, fumes and floating dust. Keep the exhaust fan and ducts clear, particularly after long engraving sessions.
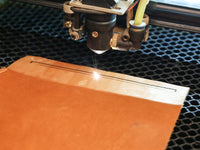
• Refresh the Laser Bed - After each job, check the laser bed and remove all the bits of wood or fine dust. While those unearthed treasures can be interesting, they may interfere with your next engraving. Taking a minute to brush or vacuum can be time well spent.
By establishing these easy habits, hopefully your OMTech Laser will produce those crisp lines and consistent cuts you expect. And with any luck, you'll begin to see less interruptions and parts that last longer over time.
How to Laser Engrave Wood Like a Pro: Step-by-Step with Your OMTech Laser
Laser engraving wood is an art far more than it is advanced technology. With the proper prepare and settings, your OMTech laser machine can take plain planks to works of art. Here is where to start:
Step 1: Select Your Wood Type and Prepare It
First select a great piece of wood! You may like bass wood; its smoothness is hard to beat, or you may like cherry for its preferred grain. Either way, be sure the surface is clean from dust and residue. This can be accomplished by quickly wiping with a damp cloth. The naturally occurring patterns in the wood will add character to your design for sure.
Step 2: Create Your Design
Using the Design software that you are most comfortable with, design your artwork. Bold lines and high contrasts are best for engraving. Save the file to a format that is compatible with your OMTech machine, and send the file via USB or software.
Step 3: Prepare
Lay out your wood on a clean laser bed. Make sure the wood is secured down, and it’s laying flat. You can set the speed, power, and engraving depth depending on the material. OMTech does provide presets to assist you. The main thing to remember is you must have a dust-free lens and mirror to get a precise engraving.
Step 4: Start Engraving
Press start and allow the laser to process it’s work. Keep a close eye on the machine during the job to ensure everything is going smoothly. If dust or small pieces collect during the job, be prepared to pause and clean.
Step 5: Clean Up
Once you have finished engraving your design, power off the machine and remove your workpiece. Quickly clean the bed and check your exhaust system for proper airflow. If adhesive or soot built up during engraving, be sure to wipe it down immediately before it’s hard to remove.
Additional Tips to Maintain Your Laser Engraver
When caring for your laser machine, consistency is key. These tips will help you develop a good routine to follow:
• Include Cleaning in the Plan:
Make cleaning part of your plan. Consider scheduling cleanings after every big job and at least once per week. While you should focus on the laser lens and mirrors, as well as the surrounding area of the machine as much as you can, this will not take too much time but will go a long way!
• Use the Correct Supplies:
Do not use any rough or abrasive materials. If you have some soft cloths and cleaning products made for optical surfaces or delicate machine surfaces, stick with those.
• Test Often:
Before starting any larger project, run a quick test on scrap wood. This is a simple way to check that everything is working properly before getting overly committed to the process, and to possibly troubleshoot any issues if not!
• Mind the Exhaust:
If your filter’s clogged or ducts are dusty, air won't circulate properly. That can lead to lingering fumes—and dirty parts. Clean or replace filters as needed.
• Keep Your Space Organized:
A clutter-free zone reduces the chance of accidental bumps or spills. Store tools and supplies within easy reach but out of the way of moving parts.
Think of these tips like brushing your teeth—not glamorous, but totally essential for long-term health. A few minutes of maintenance here and there means fewer repairs and more time creating.
Common Questions
Q: How often should I clean the lens and mirrors on my OMTech Laser engraver?
A: If you are regularly doing engraving work, a good rule of thumb is to check them every week or after big projects. If you feel there is performance loss, such as lighter burns or less defined lines, clean the lens and mirrors first.
Q: What’s the easiest way to clean the laser bed?
A: A handheld vacuum will work great for sucking up any loose dust/debris, then follow up with a soft cloth and small amount of laser-safe cleaner. As with all lasers, it's best to ensure everything is completely dry before starting your next project.
Q: Any tips for properly maintaining the exhaust system?
A: Absolutely! Clean the filters regularly, and check the ducts for the buildup of dust. Remember, a clogging exhaust slows not only your output, but can let harmful fumes linger in the air. This is unsafe for both your health and your machine.


