Laser Injury First Aid Basics: How to Handle Burns, Cuts, and Eye Emergencies
Using a laser engraver enables many creative projects - from custom signage to complex crafts. However, with great power comes safety. Even the most seasoned user can have an off day. And when lasers are involved, a simple mistake can quickly turn into an emergency. That is why you need to have a plan and the right equipment. In this guide, we will outline helpful tips for dealing with laser-related injuries, such as burns, cuts, and exposure to the eye, as well as the safety equipment that every laser shop should have.
Understand the Risks: Common Injuries in Laser Engraving
Lasers aren’t a joke; they are very effective and accurate, but misused or if there is a malfunction, they can also do a lot of damage. These are a few injuries to watch out for:
• Burns – A quick brush of the beam or hot surface can leave a nasty burn mark.
• Cuts – Cut injuries normally happen when reaching for something or taking the material into the path of the laser without thinking about it.
• Eye Injuries– A brief moment of exposure to a direct beam or a reflection is usually enough to cause an eye injury.
Accidents are predictably unlikely, assuming that you have been following safety precautions; however, it is still possible. Having a prepared first aid kit & individual with skills is your best defense.
Essential Safety Gear for all Laser Workshops
Before we get into first-aid procedures, let's ensure your workbench is fully equipped. Here are the items you should have on hand to minimize risk of workplace incidents.
• Protective gear - Laser safe goggles, heat-resistant gloves and a facemask help avoid contact with beams or hot areas of the laser.
• Laser-specific first aid kit - This isn't a typical first-aid kit. Look for one that has burn gel, antiseptic wipes, sterile band-aids, an eyeflush etc.
• Emergency instructions - A printed (or laminated) set of first-aid instructions and emergency contacts kept together, in the case of serious accidents is a good idea.
• Support documentation - It probably won't hurt to have your manufacturer's safety documents available too.
Think of this as similar to storing a fire extinguisher in your kitchen. You hope you will never need to use it, but if an incident occurred, you would be glad that you had it.
Your Laser Engraving First Aid Kit: What to Include
A proper laser engraving first aid kit should be more than just a box with a few bandages. Here’s what you’ll want to include:
- Burn relief gel: Great for soothing skin right after contact with hot materials or beams.
- Sterile bandages: For everything from minor scrapes to more serious cuts.
- Eyewash: If there’s any dust or low-level beam exposure to the eyes, you’ll need this fast.
- Clear instructions: In the moment, stress can cloud your memory. A printed step-by-step guide can help you act quickly and calmly.
Label it clearly and keep it somewhere obvious.
How to Treat a Laser Burn: Step-by-Step
Burns are probably the most common laser-related injury. If it happens, here’s what to do:
- Power down the machine: Stop everything. The first step is to prevent further harm.
- Cool the area: Run cool (not cold) water over the burn for about 10 minutes. Don’t use ice—it can cause more damage.
- Apply burn gel: Once the area is clean, gently apply a burn-specific gel to help ease the pain and prevent infection.
- Cover it up: Use a sterile, non-stick dressing to protect the wound.
- Call a doctor if needed: If it’s a deep burn or covers a large area, don’t wait—get medical attention right away.
Burns can look minor at first but worsen over time, so keeping an eye on how it heals is key.
Treating Laser-Related Cuts: Keep It Clean and Simple
Laser engraving projects sometimes involve handling sharp materials or reaching near moving parts. If you end up with a cut:
- Rinse it well: Use mild soap and water to clean out dust, debris, or splinters.
- Stop the bleeding: Apply steady pressure with a clean cloth or gauze until the bleeding slows.
- Disinfect: Antiseptic wipes or a topical solution work great for cleaning the wound.
- Bandage it: Use a sterile bandage to keep dirt out and help it heal.
- Watch for infection: Redness, swelling, or discharge? Get medical advice.
It might be tempting to shrug off a small cut, but infections can be sneaky—don’t ignore the signs.
Eye Safety and First Aid: Don’t Take Chances
Your eyes are especially vulnerable when working with lasers. If you ever suspect that a beam (even reflected) got too close, take it seriously:
- Hands off: Don’t rub your eyes—it can make things worse.
- Rinse gently: If it’s safe, flush your eyes with lukewarm water for several minutes.
- Reduce light exposure: Cover your eyes with a clean cloth to reduce sensitivity.
- Get medical help immediately: Even mild symptoms can signal serious damage.
- Wear proper goggles: Laser-rated eyewear is a must every single time you fire up the machine.
Vision injuries aren’t something to “wait and see.” Act fast and get it checked.
Building a Safety-First Workshop Culture
Good safety habits don’t happen by accident—they’re built into your routine. Here are a few simple ways to keep your space safe:
- Regularly inspect your laser machine for wear and tear.
- Train everyone who uses it on basic first aid and emergency steps.
- Post visible signs near your machine with quick-reference instructions.
- Keep your first aid supplies stocked, labeled, and easy to grab.
Safety shouldn’t slow you down—it should give you the confidence to create without fear.
Stay Ready with OMTech and Smart Safety Practices
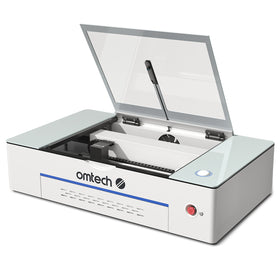
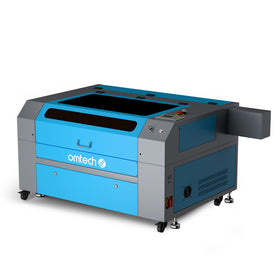
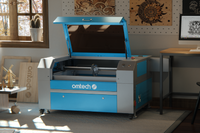
OMTech laser machines are built for precision, but true peace of mind comes from knowing you’re ready for anything. Whether it’s treating a quick burn, covering a small cut, or protecting your eyes, having a well-stocked laser first aid kit and knowing how to use it can make all the difference.
Being prepared doesn’t just protect your body—it protects your projects, your time, and your peace of mind.
FAQs.
Q: What should I include in my laser engraving safety kit?
A: Some suggested items include laser-safe goggles, heat resistant gloves, burn gel, sterile dressings, antiseptic wipes, eyewash solution, and an easy to read and printed guide to treatment for common injuries.
Q: How do I treat a small laser burn at home?
A: First, cool the burn site with running water (not ice) for at least 10 minutes, then apply burn gel to the site and cover with a sterile bandage. If there is a significant surface area of a deep second-level burn, see a doctor.
Q: How do I avoid laser eye injuries?
A: Wear certified laser safety goggles at all times. Remove reflective surfaces from the bed or working area and ensure your laser machine is regularly inspected for proper operation and maintenance.


