


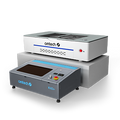


The Art of Laser Engraving on Curved Surfaces with Rotary Attachments
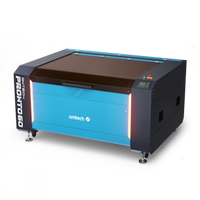
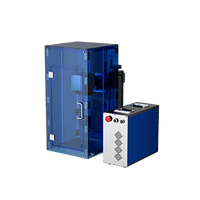
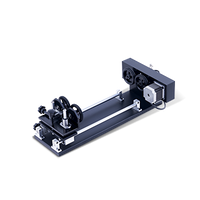
Flat surfaces are great—but what if your canvas is curved, bent, or rolled? Now things get fun. Whether you are engraving on a wine bottle, customizing a stainless steel tumbler, or going really fine on a round part made of metal, OMTech Laser machines bring you the capability to make engraving curved surfaces easy and precise. So where does this capability come from? The rotary attachment. When it comes to rounded or cylindrical objects, it is your best friend.
In this guide we will cover practical tips and techniques to get you on your way to mastering laser engraving on curved surfaces using OMTech lasers and technology.
How Does Laser Engraving on a Curved Surface Work?
Laser engraving used to be flat, but not anymore! The technology has improved significantly, and with the emergence of accessories, such as rotary tools, we can now engrave anything from a stemless wine glass to a spherical ornament—not just square coasters and flat plaques.
Here are some basic things to keep in mind:
• Change Power and Speed: Curved surfaces will affect the laser's distance to the material, so if the distance changes, you'll want to change speed and power as well.
• Map out the Curve: Style your artwork to follow the object’s curve to get better and more consistent results.
• Experiment with Angles: Testing different focus heights and focusing angles of the laser head can help create smoother results, mostly on tight curves.
These couple of adjustments help ensure your designs are crisp and professional wherever the object is rounded.
Why Rotary Attachments are a Game-Changer
Engraving on a glass without a rotary attachment is like trying to paint on top of a spinning top with a steady hand—it's frustrating and makes a big mess. With a rotary attachment, there is no guesswork whatsoever. A rotary attachment rotates the object while the laser does all the work so everything remains lined up and consistently exposed to the laser beam.
Here's why they are worth it:
• Smooth Rotation: The bottle, mug, or glass is constantly moving, so your design flows naturally as it circles the object.
• Perfect for Spheres: Shapes that are normally complex to engrave, like balls or rounded pieces of wood, become immediately turn-key worthy when rotation is matched to your laser.
• Focus Adjustments are a Breeze: With the right setup, you can easily adjust the focus of your laser to match the curvature of the object, on the fly!
Once you have a rotary attachment installed, the projects that seemed unreachable become second nature.
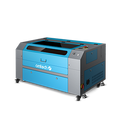
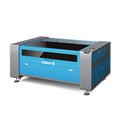
Getting Started: Set Up Your OMTech Laser for Curved Work
OMTech's machines are known for their simplicity and engraving curved items is no exception. I've put together a quick little walkthrough to get you started:
1. Choose Your Material
Start with a clean and rounded object, such a stainless-steel tumbler, curved glass, or aluminum bottle.
2. Attach the Rotary Attachment
Ensure your rotary attachment is secure. If your item isn’t secured firmly, it may slip. The more stable your object is, the smoother your engraving will be.
3. Artwork Development
When using laser compliant software, bend or fit your artwork to your object, much like you would wrapping a sticker on a water bottle. You want the artwork to lie flat.
4. Setting Adjustment
Modify the power, speed, and focus curvature values of your laser with OMTechs user-friendly controls, making sure the beam stays sharp and straight when it travels over the surface of your object.
5. Engrave
Hit the button, and wait. The rotary will spin slowly, and you will embrace the laser cutting at work, which will provide a clean and consistent design, ready to engrave your next artwork, is prepared for your next engraving design.
Tips Specific to Material for Improved Results
Engraving on surfaces that have curves can be a step into trial and error, particularly with creating different materials. Here are some materials specific tips to help you minimize the guesswork:
• Glass (wine glasses, curved awards):
Glass is very sensitive to heat so slow down. Glass also can limit the power you can use, and do not stay in one space for too long.
• Bottles and tumblers:
The bottle should fit tightly in the rotary device. Overall keep a steady consistent speed for the best wrap projects.
• Curved metal surfaces:
Metals can also reflect the laser beam. You could use a marking spray or other marking coating to help the laser grip the surface. It is also important to attempt to find the right height for the laser focus height for the curvature.
• Spherical items:
Make sure you really pay close attention to these types of items. Do a test project first to ensure you will reach all of the curves evenly with your design.
Every material has their quirks, but once you learn how to best deal with them, the opportunities for creativity are endless.
Fine-tuning using laser focus curvature
Curved engraving is all about keeping the laser focused (even if the surface is not flat). This is where OMTech’s laser focus curvature adjustments will be useful.
• Keep Intensity Across Curves:
By adjusting the focus as the surface curves away or toward the laser, you will maintain the full intensity of the beam.
• Conduct Test Runs:
A few small test engravings will help you iron out your settings before starting the actual engraving - especially on detailed or expensive items."
With a few easy adjustments, you will see a significant increase in engraving quality, whether that be deep, even lines on metal or crisp, sharp etching on glass.
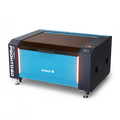
Let Your Creativity Curve with Confidence
With OMTech Laser, engraving curved surfaces does not have to be an intimidating experience. With the easy-to-use controls, reliable rotary attachments, and powerful software, even complex shapes can be added to your creative repertoire. Whether you are personalizing glassware for a wedding client or prototyping a product made of curved components, OMTech will help turn your ideas into full circle (literally).
FAQs: Let's Clarify the Curved Confusion
Q: Can I not use rotary attachments for engraving curved items?
A: You need to use a rotary attachment to allow your item to rotate in such a way that the laser will maintain its path in relation to the item’s surface. This way, the laser will always engrave at a consistent depth and detail across the surface and curved surfaces of difficult shapes like a bottle or sphere.
Q: How can I get clean results engraving curved items?
A: First, you must make sure the item is mounted securely and properly and then set your laser power, speed and focus curvature. Second, design your artwork to conform with the object’s curvature to avoid distortion.
Q: Can OMTech Laser machines engrave all curved surfaces?
A: Yes! Including glass, metal and plastic. You will only need to adjust your laser based on the material; there are enough adjustments for focus curvature built into OMTech Lasers that you will be able to engrave curved items much easier than you might think.


