How Halftone Dots and Laser Shading Bring Images to Life
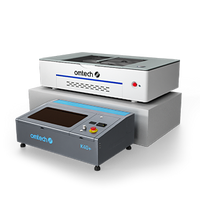
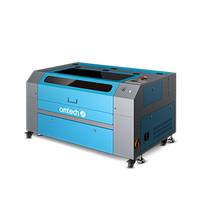
When you consider a name synonymous with advance tech and intuitive products within the laser engraving space, OMTech Laser comes to mind. They have a variety of products that range from entry level to more sophisticated engraving capabilities suitable for everyday images. If you are new to laser engraving, the possibilities of your creative application will be endless with OMTech tools at your disposal.
When you began exploring laser engraving, perhaps you thought it was only about cutting shapes. You realized quickly that it was not just shapes - when done right with shading and halftone dots, laser engraving can create visual interest and depth to any project. If you've ever turned an ordinary photo into a wood burned sketch, you can appreciate what OMTech laser machines can produce - engraved images with the precision and power of a laser.
What is Halftone dots and why are they useful?
Let me break it down: halftone dots play an important role in photo engraving, and please picture them as small dots (similar to the pixels on your computer screen) that work together to create the gradients and shadows of an image. Instead of flat one note photo engraving the halftone dots allow your laser machine to add a layer of detail that mimics textured natural shading, a full tonal rendering is akin to taking a range of grey and turning it into a pencil drawn image.
Laser shading works very well with this technique as it adjusts the intensity and speed of the laser to create a soft gradient from light to dark. This technique adds depth and texture to your engraved images and helps to create a more realistic 3-D Engraved image, ideal for photo portrayals, custom business signage, or as an artistic display of your creativity.
Raster vs. Vector: What’s the Difference in Laser Engraving?
If you've ever pondered whether raster or vector engraving is preferable, the answer is... it depends on your project.
• Raster engraving is like digital painting, as it processes your image line by line (like a printer) and excels at engraving exacting image detail - such as photographs depth- or shading-heavy designs. If you're looking for every little nuance, such as engraving a grayscale photograph, raster is the way to go.
• Vector uses paths and curves, therefore it offers precise edge details. Vector is ideal for lines with a clean edge, or when engraving logos, text, or technical drawings. However, it may be lacking for photo realism, i.e., detail that relies on edges and contours, or depth changes from shading.
Good news! OMTech's machines can do both. So, whether you need detail for an artistically engaging fine detail portrait or you're cutting a thin line company logo, you can do both (and more).
A Simple 5-Step Process for Using Your OMTech Laser for Beginners
Using your OMTech Laser for the first time does not have to be stressful. Below you will find a simple, 5-step process to get you engraving high-quality images—especially on wood—without losing breath.
1. Set up and Prep your Material
Start by selecting a material that will allow you to achieve your project intention. If you are engraving wood, make sure your wood has an even grain, and a no-nonsense finish. A quick wipe off of dust and debris will go a long way, akin to getting your canvas ready for painting.
2. Design your Image
Now it's time to design your image using any design software you love to work in. The clearer your image, and the better the contrast, the better the engraving will be. Save your designs as a BMP, JPEG, or PNG file. The OMTech Laser machine should read all of these file types if they are intended for raster engraving.
3. Set Up the Laser
Now that you have an image, it's time to setup your laser. Start by adjusting the power, speed, and frequency based on the material that you're using and detail you are seeking. The OMTech Laser interface is easy to use, especially for beginners, so don't be afraid to play with the machine settings to produce shading quality effects.
4. Start the Engraving Process
With everything set up, let your OMTech Laser do its magic. It will use raster engraving combined with halftone dots to create that high-resolution finish. Keep an eye on the process and feel free to pause if you need to check progress—slower speeds usually mean more detailed results.
5. Clean Up and Add the Final Touch
Once the engraving is done, remove your piece and gently brush off any residue. You’ll notice how the photo details and shading come to life. If you want to protect or enhance the finish, a quick coat of sealant or oil can really make your work pop.
Extra Tips to Elevate Your Engraved Images
Want to take your photo engravings to the next level? Try these practical tips:
- Test different shading techniques to see what brings out the most depth in your images.
- Always use high-resolution source images—what looks sharp on screen might blur when scaled.
- Play around with laser speed and power to perfect transitions between light and dark areas.
- Compare results from raster vs. vector engraving in your own projects. Seeing the contrast side by side can help you choose the best method moving forward.
With OMTech Laser, you’re not just engraving—you’re telling a story with light and texture. Whether you're designing gifts, educational tools, or art pieces, the right technique can turn a simple image into something truly special.
Frequently Asked Questions About Image Engraving
Q: Why do halftone dots enhance my engravings?
A: Halftone dots replicate subtle differences in light and shadow with patterns of little dots. Halftone is crucial for high resolution or grayscale engraving because it helps your laser engravings simulate more realistic features—like depth in a face or texture in a landscape.
Q: What is the actual difference between raster and vector engraving?
A: Raster engraving is done pixel by pixel which makes it more suitable for complex images or shaded images. Vector engraving is done along paths which creates crisp lines, but not as much tonal variation. Most photo or detailed engraving enthusiasts will stick with raster since it produces the best results.
Q: Can I make adjustments to laser shading while using different materials?
A: Definitely! OMTech has full control over these key settings; power, speed, and frequency. You can adjust these elements based on what previous materials you used, whether wood, acrylic, or otherwise, for the best image quality possible.


