DIY Laser Cutting Arts: Miniature Models Made Easy
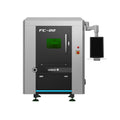
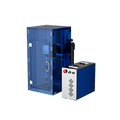
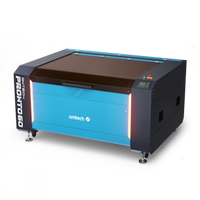
When it comes to making accurate miniature models, OMTech Laser is the best choice to make this experience accurate and reliable. Whether you’re into prototyping and model making or creating advanced laser cut scale models, this technology makes the process fun and accessible. With the help of new technology, it has never been easier for everyone to enter the DIY laser cut models world. Technology at its best without complicated technology, will allow the beginner to create DIY laser models with easy-to-follow steps.
Utilizing Laser Engraving for Model Making
Laser engraving is a fantastic option for anyone involved in Precision Creation. Here are some great applications where you can utilize OMTech Laser process:
• Applications Of Laser Engraving – the applications are limitless from fine detail designs on thin materials to prototyped laser engravings on heavy product prototypes
• Prototyping and Model Making – rapid prototyping laser techniques allow you to quickly fabricate small models or parts for architectural model laser projects as product prototypes.
• Laser Cut Models – Create laser cut scale models with fine detail perfect for educational model engraving, or something fun for a hobbyist DIY.
• 3D Prototype Engraving – Make some detailed 3D elements that give your model making laser projects more dimensional and realistic.
• Architectural Model Laser – Use laser cutters to create accurate laser engravings on all types of materials to build historical buildings or futuristic designs.
Getting Started with Miniature Models with OMTech Laser Machine
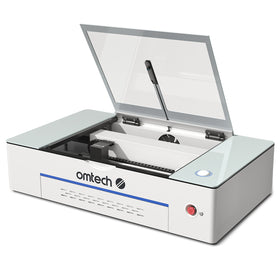
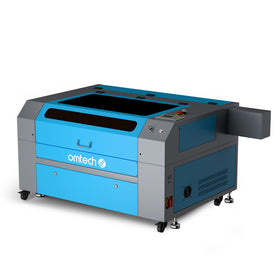
If you want to start doing DIY laser cut arts, getting a good machine like the OMTech Laser is a great way to begin. Constructing miniature models using a laser cutter and engraver is very easy! Here is a simple 5 step process to get you on your way:
Step 1: Choose Your Material
First is material choice. What material to use when you will be using laser cut models, and engraving as a teaching aid? Acrylic, wood, or paper are the best materials to start with as they will work well together. Please ensure that the material is flat and secured before beginning to engrave and cut. The OMTech Laser machines are capable of a variety of materials, so do not be afraid to test out some different materials.
Step 2: Create your Design
Using easy to use design software, draft your model or pattern. This pattern/model will be the outline for when you are laser engraving. One suggestion is to identify the lines of your model very clearly as this will help to shape and construct each section of your 3D prototype and the engraving process. Your designs can be just shapes or could be something complicated, such as an architectural image!
Step 3: Set up the Arm
Place your chosen material onto the laser cutting bed and secure it properly, so it does not move throughout the operation. Adjust the laser settings, speed, power, and focus, to ensure you match the laser settings with the thickness of your material and the complexity of your design. OMTech Laser machines always come with preset settings to make this step much easier.
Step 4: Cut and Engrave
Start the laser and monitor the process on the machine display. The laser will process each detail by following your design as it goes, cutting the material with accuracy for laser cut models and laser engraved prototypes. The process will engage you as you see your design specialty forming.
Step 5: Finish and Assemble
Once the laser finishes the cut and engraving, pull your material off the bed and wipe off any debris left behind. If your design has multiple layers or parts, carefully assemble the layers to create your final miniature model. If you want to put finishing touches on your model like sanding or painting it is relatively simple to give it a polished appearance.
Awesome Tips for DIY Laser Cut Models and Rapid Prototyping
Here are some awesome tips for making the best of your OMTech Laser and really enhance your model making projects:
• Experiment with material variety - It's fun to try out different materials, taking in different textures, like smooth acrylic versus a natural wood. Different materials will give your laser cut models different qualities too.
• Use both engraving and cutting - Don't forget that you have the option of using both laser engraving and laser cutting together to add not only structure to your prototypes but also intricacy too!
• Start small and simple - It's always best to first build your confidence with simpler patterns and designs before tackling larger projects. Over time you gain the ability to take on larger and more sophisticated projects too - like architectural model laser projects that are precision-oriented.
• Use the rapid prototyping laser to iterate quickly - The beauty of the rapid prototyping laser is its ability to iterate quickly. You can try, iterate, make changes, and hone your laser cut models after very little wait time!
• Learn from others through online communities and tutorials - Many DIY enthusiasts enjoy giving back to the community by showing their methods for completing projects online. There's a lot of great information out there to help you explore possibilities for model making laser applications.
These tips will allow you to not only develop your skills, but push you to explore the limitless potential available to you through laser prototyping and model making laser processes.
Elevating Your Models to the Next Level: Moving Beyond the Basics
Once you've got the basics down, you might want to incorporate some advanced techniques into your miniature models. You can build detailed architectural models. You can make fun prototypes of products using an OMTech laser machine. Some people use this machine for model building for educational purposes by engraving the model and creating engaging tools for education and classrooms. They enjoy creating challenging scale models using laser cut designs which include detailed complexity and realistic textures that are suitable for collectors or professionals in the industry.
Additionally, the ability to rapidly prototype using laser technology and being able to modify your design continuously, leads to improved designs. When you are laser prototyping a product, you have the ability to change the model after every design iteration to achieve the best possible design. This level of precision and creativity is why OMTech Laser machines are widely popular in every field and enable you to have the exact results with your DIY project.
Common Questions
Q: Is the OMTech Laser machine OK for a beginner in model making?
A: Yes, very much! The OMTech Laser machines have easy to use interfaces and preset settings to give you a great start in laser-cut DIY models, DIY methods and funny names like quick prototyping with laser techniques in modelling - who knew!?
Q: Can I use the laser machine to develop both laser-cut models and laser engraved prototypes too?
A: Absolutely! The OMTech Laser machine versatility allows you to perform many tasks in very different ways - from precise laser cutting to build architecture models, unlike thoughts on laser cutting techniques to hospital screens to simple school 3D prototype engravings and school educational model engravings.
Q: What materials work best with DIY miniature models used with OMTech Laser?
A: Acrylic, wood, and even some plastics (OPG & others!) can work well for DIY laser-cut materials. Each material you may consider will be a different texture and finish, and your audience will see how this fits nicely into your overall project. Please review for material options.


