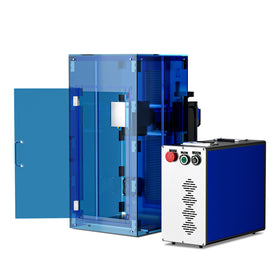
Cool Laser Marking Secrets: Custom Logos with OMTech Precision
Laser engraving is more than just a fun technology experience—it's become a necessary tool for creators, educators and small business producers. Whether you are personalizing wooden items, or marking metal parts with serial numbers, OMTech Laser makes it all simple, accurate, and long-lasting. The purpose of this guide is to expose you to some of the most valuable laser marking hacks—from adjusting your engraving settings, to successfully engraving metals like a professional.
Understanding Laser and Marking Techniques
Manufacturers continue pushing forward with new laser technology meaning you are no longer restricted to only engraving onto wood, using an OMTech Laser gives you many different forms of creativity (or maybe even some professional possibilities). Here is a brief overview of the techniques you will want to have in your toolbox.
• Laser Engraving: The fundamentals of being able to create basic and then detailed shapes, patterns and designs in materials for example, plastic tags to a hardwood coaster.
• Material Marking: Each material has its own idiosyncratic issues. Which marking technique is best for which material can mean the difference between quality and durability.
• Custom Branding and Tools: Got your logo? Or do you need the serial number of your objects to actually be legible? Custom engraving tools do exist which can bring designs and parts to "the next level."
• Know Your Safety Requirements: In particular when engraving on delicate materials or labelling for compliance, you will want to ensure your engravings are manufactured according to the expectations of safety and industry standards.
With these basic skills you can go from engraving artisan gifts to precision made, and scannable manufacturing parts plastics, woods, and metals.
How to Laser Mark Metal Like a Pro
Although engraving on metal may seem overwhelming at first glance, it’s easier than you may think once you get the hang of it. Just remember these five important steps to getting sharp, permanent results with your OMTech machine:
1. Prep Your Surface
You’ll need to get clean first. Wipe down as much of the metal as you can to remove any oils or dust. This will allow the laser to bond properly, and provide a nice, finished appearance.
2. Dial In Your Settings
Not all metals respond the same. Stainless steel, aluminum, and coated surfaces all react differently. Utilize OMTech's pre-programmed material profiles as a baseline, and then modify your speed and power to enhance your particular project.
3. Upload Your Design
Whether it’s a custom logo, or a scannable barcode, be sure the design is crisp and vector-based. The cleaner the linework, the cleaner the engraving will appear.
4. Let the Laser Do the Work
Once you have affixed the metal sheet to your bed, hit ‘start’. Watch the project and look for a consistent depth, and clarity once the job nears completion.
5. Inspect and Adjust if Required
After it is complete, take a close inspection of your work. You can make adjustments as needed if the laser engraving, mark, or whatever was required doesn’t appear properly, or it isn’t deep enough, etc. You have that option to rerun the job with modified settings.
QR Codes, Barcodes & Serial Numbers: Functional Meets Fun
Using QR codes, barcodes, or serial numbers is not just smart but it also provides value and credibility to your product. With precise control, these markings do not just look great...they will also scan and function great on your product
• QR Codes - To make your design scannable, always tried to make each square crisp and readable. Even the smallest distortion in any part of any square can render it unusable, so precision matters.
• Barcodes - These require a high contrast and consistent latent depth to be used on the majority of scanners. OMTech allows for easy adjustment to find that delicate balance.
• Serial Numbers - Whether you use them for batching and tracing products or just to personalize your handmade items, engraving serial numbers is a way to combine utility and branding.
With a small amount of practice, these "functional engravings" can undoubtedly also become part of your design aesthetic.
Branding with Laser Precision: Engraving Your Logo
Your logo is more than just decoration when you put it on a product—it's your autograph. Laser engraving ensures that this autograph is as readable, sharp and permanent as you can make it. Here's how to do that:
• Be sure to optimize your artwork: Vector graphics (SVG, AI files) are best suited to the type of clean, scalable lines that laser engraving and cutting need. Don't use raster images unless vector just won't work.
• Consider the material: Whether it's anodized aluminum, acrylic, or natural wood, you need to adjust your gauge and speed to tailor to the surface. OMTech has profiles already created, and those are good starting points here.
• Tweak the look: Adjust the depth and contrast to get visibility in the heavier areas of the logo without losing the delicate areas.
• Inspect your work after engraving: Look under good lighting when your piece is finished to see the potential. A little wipe off is sometimes all it takes for an outstanding final product.
Getting Started with Your OMTech Laser Machine: Step-by-Step Instructions
Are you new to the world of laser engraving? Don't sweat it, we have a simple roadmap that will help you get up and running.
Step 1: Choose Your Material
Choose your engraving material. Wood is warm, plastic is versatile, and metal is durable. Make sure the material is clean, so that the laser can etch a clear mark.
Step 2: Create Your Design
Use software like LightBurn to draw your logo, QR code, or artwork, or import it. Save your artwork in a supported file format and you are ready to go.
Step 3: Set Up Your Machine
Secure your material to the laser bed. Set your engraving job with a preset or manually set the speed, power, and frequency for the material you are using.
Step 4: Press Go
Start the engraving job and watch the engraving unfold live as your laser engraves, which can be helpful for precision jobs like serial numbers or logos.
Step 5: Clean and Inspect
Once the engraving is complete, remove your material and check your engraving for detail and clarity. A quick clean with a soft brush or cloth will help enhance your design.
Pro Tips for Flawless Results
Want to take your laser engraving to the next level? These simple habits can make a big difference:
- Stick to Consistency: Use presets as your baseline, then customize settings for different materials or projects.
- Test First, Then Go Live: Always try new designs on scrap pieces to avoid costly mistakes.
- Keep It Clean: Regular maintenance—like cleaning the lens—helps maintain quality and extends the life of your machine.
- Practice Makes Progress: The more you engrave, the better you’ll understand how different materials respond. Don’t be afraid to experiment.
OMTech Laser machines are built to grow with you—whether you’re a weekend hobbyist or a full-time maker.
FAQ: Answers to Your Common Questions about Laser Marking
Q: How can I choose the right marking technique for the materials I'm using?
Begin with OMTech's presets, based on whether you're marking wood, plastic, or metal. Then test and adjust your settings from there. Eventually, you'll find what you like for each, and what works best for you.
Q: What is a common mistake when engraving logos?
Using pixel-based images, rather than clean vector files, would be one of the biggest mistakes. Always start with vector graphics, since you'll get clean lines, as well as more control over details.
Q: Can I engrave durable labels for items that are used every day?
Definitely. Just make sure to set your settings appropriate for the durability of your material. If your material is durable, your laser and settings will make markers that stand up to daily wear and tear - great for tagging up tools, labels, or industrial parts.


